Documentation Index
Fetch the complete documentation index at: https://docs.zencoder.ai/llms.txt
Use this file to discover all available pages before exploring further.
Rules Organization and Hierarchy
Zencoder uses a hierarchical system of rules and instructions to provide the most relevant context. Understanding this hierarchy helps you choose the right approach for your needs:Zen Rules
Project-specific rulesStored in
.zencoder/rules/*.md files in your repository. Applied conditionally based on file patterns or always when specified.Instructions for AI
Personal preferencesGlobal instructions stored locally on your machine. Applied to all projects and conversations automatically.
Repo Info
Generated contextCreated by running the Repo Info Agent to provide comprehensive understanding of your project structure and workflows.
How Each Level Works
-
Zen Rules: Project-based markdown files that provide custom context to Zencoder’s AI agents. Unlike global AI instructions, they’re committed to your codebase for team sharing and can be applied always (
alwaysApply: true) or conditionally based on glob patterns. Perfect for team standards, architecture guidelines, and project-specific conventions. -
Instructions for AI: Your personal, global preferences managed through Zencoder’s three-dot menu →
Instructions for AI. These apply across all your projects and are ideal for general coding style preferences or tone of voice the agent is using to respond to you. -
Repo Info: Generated context about your repository structure, technologies, and patterns (requires running the
/repo-infoagent). This runs withalwaysApply: trueto help all agents understand your project better.
Getting Started
1. Locate the Rules Directory
Your Zen Rules live in the.zencoder/rules directory at your project root. When you upgrade to the latest version of Zencoder, this directory is created automatically with proper migrations handled for you.
You might notice a 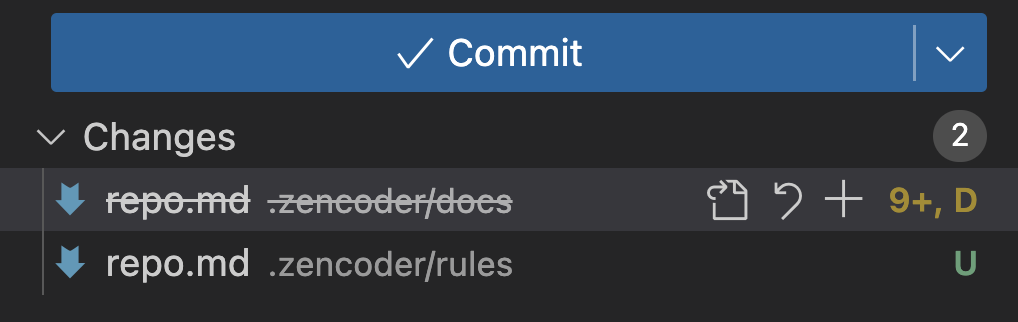
repo.md file already present in your .zencoder/rules directory. This file is created by the Repo Info Agent and provides project context. Learn more about working with repo.md in the Repo Info Agent documentation.Since repo.md and custom Zen Rules serve different purposes, check out our quick guide on choosing the right approach to understand when to use each one.If you had rules in the previous .zencoder/docs location, we’ve migrated them to the new .zencoder/rules structure. The old .zencoder/docs location is now deprecated for rules.If you check your git commit history after upgrading, you’ll see the migration reflected as file moves from .zencoder/docs/ to .zencoder/rules/:2. Create Your First Rule
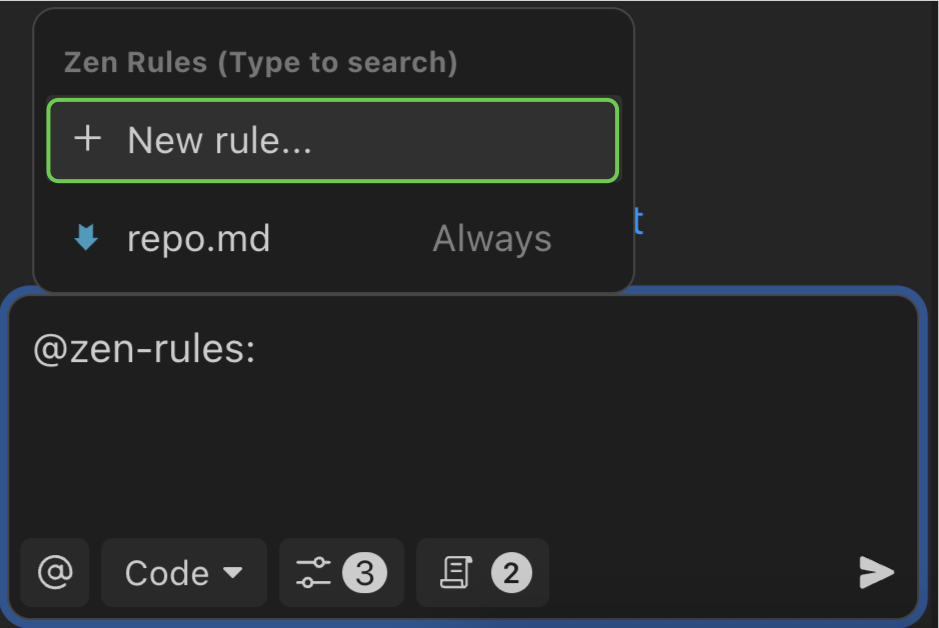
To create a new Zen rule, you can use the built-in rule creator directly from the chat interface:- Click the
@sign in the chat input box - Select
Zen Rulesfrom the dropdown menu - Click on
+ New rule...at the top of the rules list
Rule Template Structure
When you create a new rule, you’ll work with this template structure:Example Rule
Here’s an example of a complete rule for markdown writing styles:3. Reference Rules in Chat
You can manually include any rule by @mentioning it in your chat. Type@ and then select Zen Rules from the dropdown, then choose from the list of available rules:
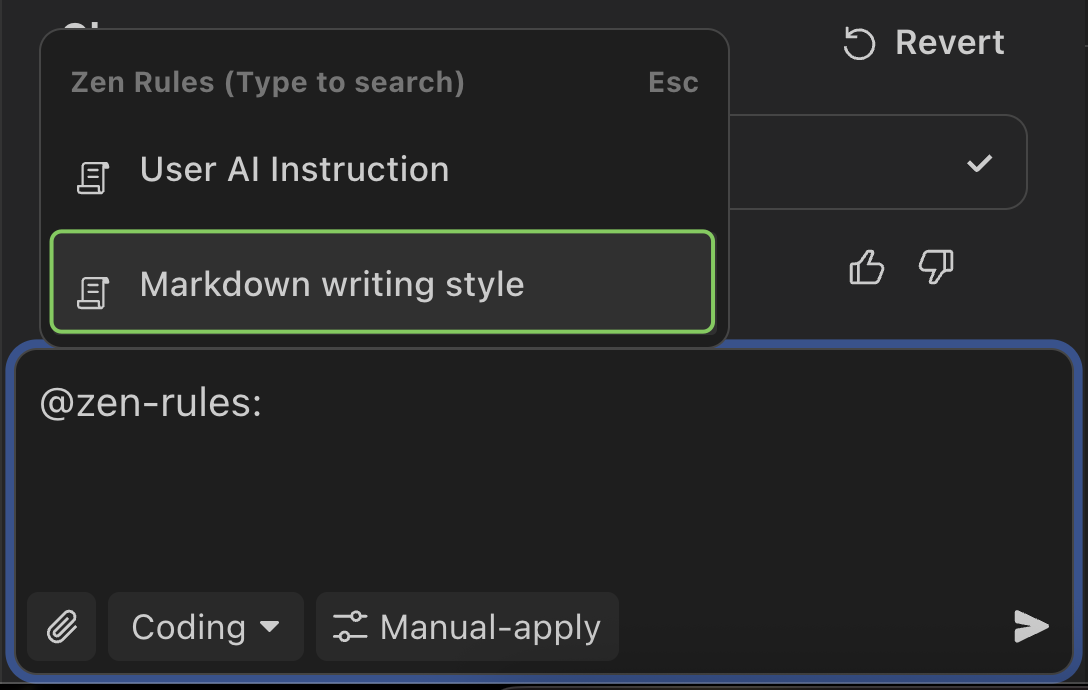
alwaysApply: true or matching glob patterns as described earlier.
4. View Applied Rules
You can now see which rules are currently active in your chat by clicking on the rules icon in the toolbar. The icon displays a badge showing the number of applied rules, and when clicked, reveals a panel listing all currently applied rules: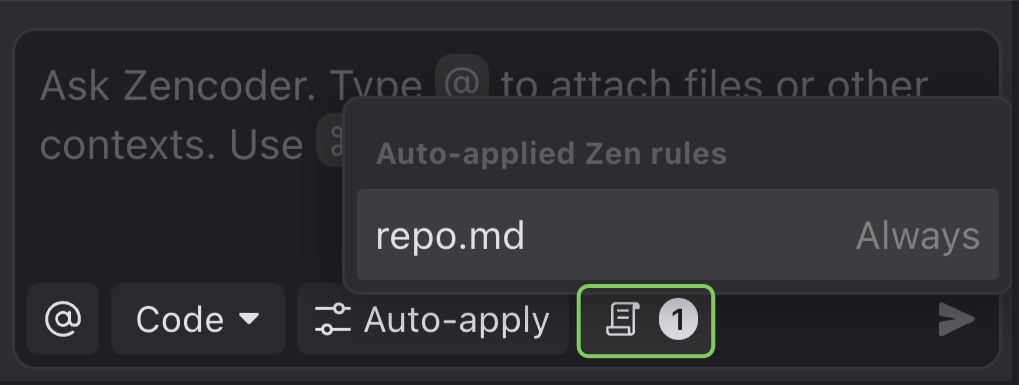
The rules icon provides instant visibility into which rules are influencing the AI’s responses, including both auto-applied rules (based on your current file context or
alwaysApply settings) and manually referenced rules from your @mentions.Rule File Format
Each rule file follows this structure:Frontmatter Fields
| Field | Required | Description |
|---|---|---|
description | Yes | Brief description of the rule’s purpose. Displayed in chat when @mentioning rules and used by agents to understand rule relevance. Example: "TypeScript coding guidelines and best practices" |
globs | No | Array of file patterns that trigger this rule. Rule is automatically included when working with matching files. Examples: ["*.ts", "*.tsx"], ["src/**/*.js"], ["*.md", "*.mdx"] |
alwaysApply | No | Boolean (default: false). When true, rule is included in every request regardless of file context. Note: When true, the globs field is ignored |
Practical Examples
Here are two complete examples showing different types of rules and how they’re structured:Markdown Style Guide - Content formatting rules
Markdown Style Guide - Content formatting rules
API Development Standards - Backend development guidelines
API Development Standards - Backend development guidelines
How Zen Rules Work
When you send a message to Zencoder, the system automatically includes relevant rules in the context:- Always applied rules are included in every request when you set
alwaysApply: truein the frontmatter. That’s the case withrepo.md, for example. - Pattern matched rules are automatically included when you’re working with files that match their glob patterns
- Manually referenced rules are added when you @mention them in your chat for that specific request
Rules are added to the LLM context alongside your message, giving the AI agent comprehensive understanding of your project’s requirements and standards.
Choosing the Right Approach
Understanding when to use repo.md (and Repo Info agent) versus custom rules helps you organize context effectively.repo.md
- Project structure and architecture patterns
- Build commands and development workflows (especially in non-monorepo projects)
- Technology stack and framework configurations
- Dependencies and package management details
Custom rules
- Coding standards and style guidelines
- File-specific conventions (using globs to target specific file types)
- Team processes and review requirements
- Conditional logic that applies only to certain directories or file patterns
Configuring Rule Folders
Compatible with other AI tools! If you’ve been using AI coding assistants like Cursor, Windsurf, Cline, or Continue, Zencoder can read your existing rules without migration. Simply configure Zencoder to search in their rule folders.
.zencoder/rules folder by default. However, you can configure additional folders where Zencoder will look for AI rules (*.md and *.mdc files). This is particularly useful if:
- You’re switching from another AI coding tool and want to keep using your existing rules
- Your team has established rules in different locations
- You want to organize rules across multiple directories
Setting Up Additional Rule Folders
- VS Code
- JetBrains
To configure rule folders in VS Code: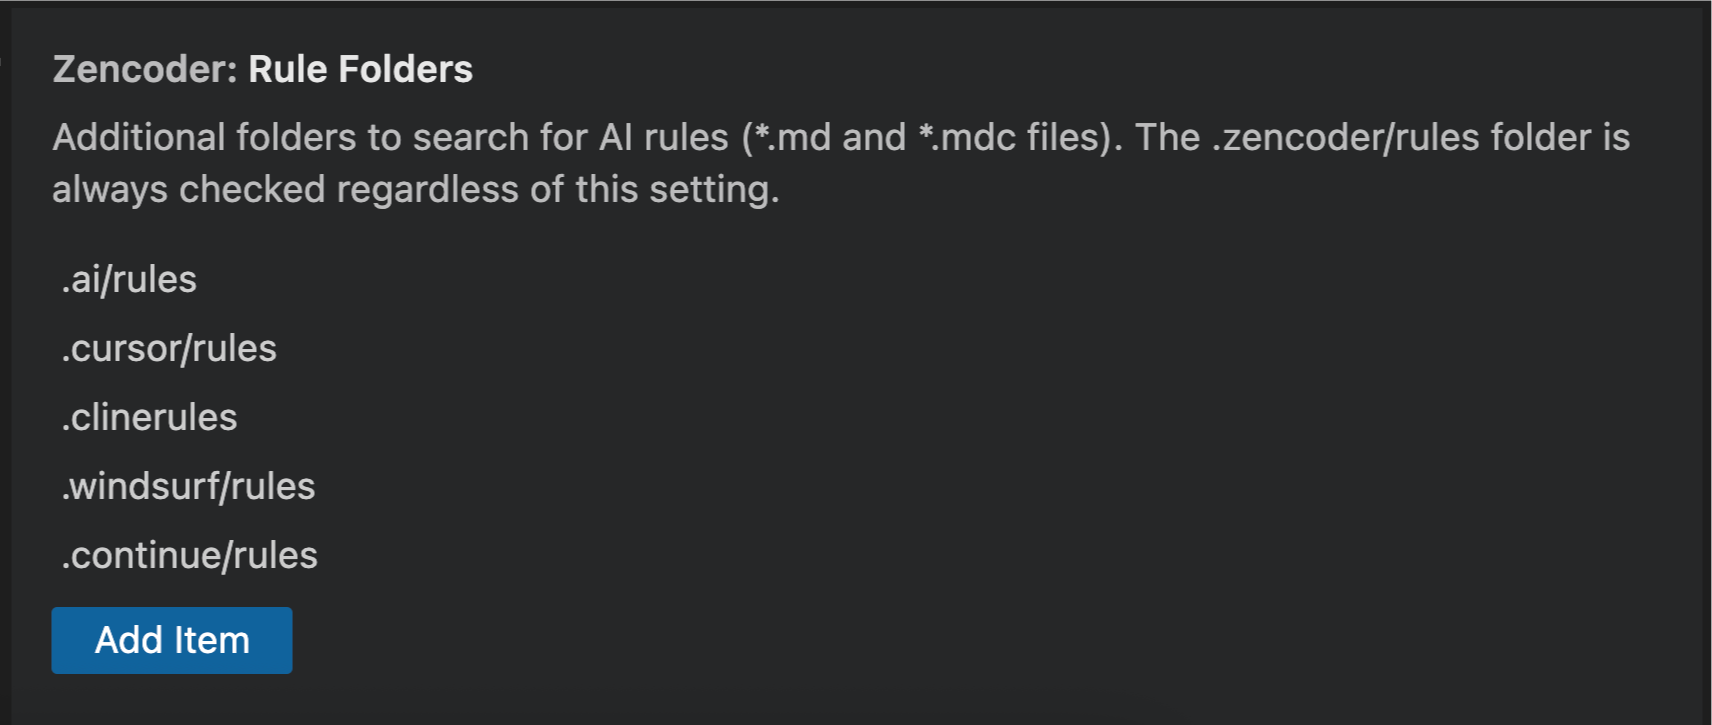
- Go to the Zencoder
⋯(three-dot menu) - Click on
Settingsfrom the dropdown menu - In the sidebar, scroll down to find
Zencoder: Rule Folders - You’ll see predefined folders for common AI tools:
.ai/rules.cursor/rules.clinerules.windsurf/rules.continue/rules
- Click the
Add Itembutton to add custom folders
The
.zencoder/rules folder is always included regardless of this setting and cannot be removed.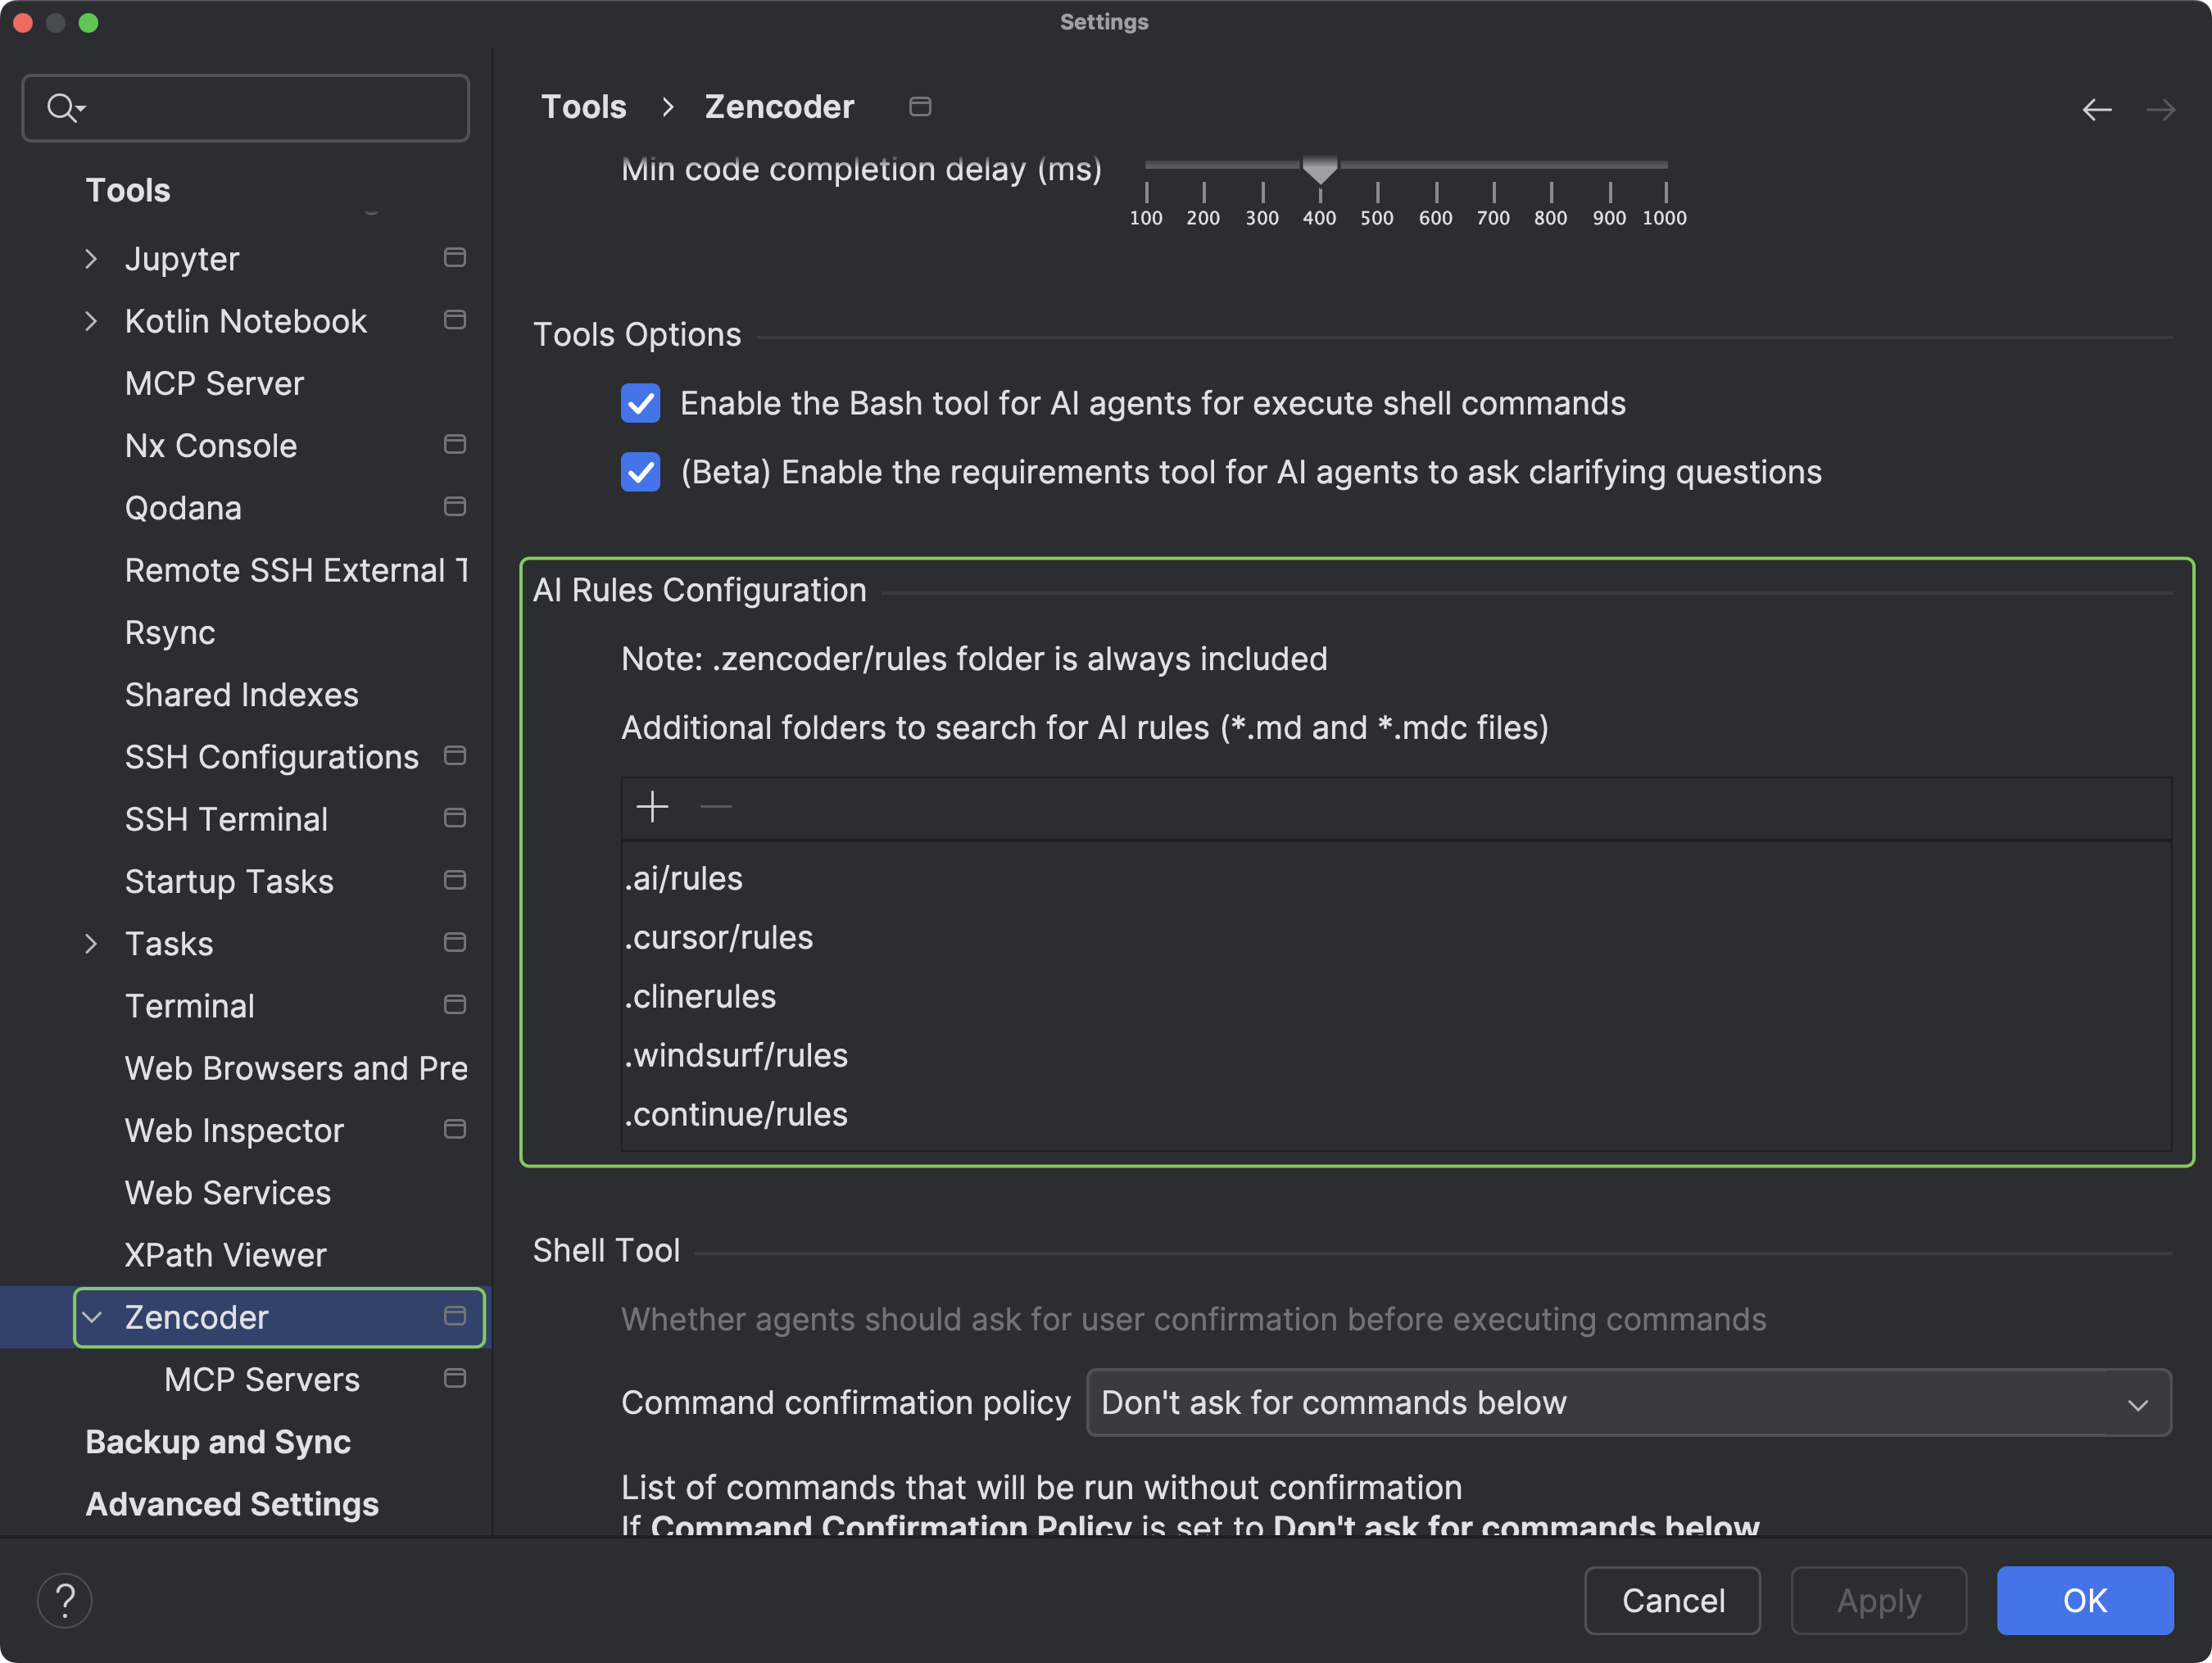
How It Works
When processing a request, Zencoder:- Always includes rules from
.zencoder/rules(the default location) - Searches all configured additional folders for
*.mdand*.mdcfiles - Applies rules based on their frontmatter configuration (
alwaysApply,globs, etc.)
Best Practices
Good rules are focused, actionable, and scoped to specific concerns. Think of them as internal documentation that guides both your team and the AI.Writing Effective Rules
Keep it concise and specific. Aim for under 300 lines per rule and avoid broad instructions like “write good code” - the AI already knows general best practices. Instead, focus on your project’s specific requirements and patterns. Use clear formatting. Structure your rules with bullet points, numbered lists, and markdown headers. This makes them easier for the AI to parse and follow:Organization Tips
Split large rules into multiple, composable files rather than creating monolithic documents. Use descriptive filenames liketypescript-standards.md instead of generic names.
Use globs effectively to target specific directories or file types. This allows you to apply rules only where they are relevant, reducing noise in the AI’s context.
Turn repetitive prompts into rules - if you find yourself writing the same prompts over and over again, consider creating a rule file to capture that knowledge.
For complex workflows, if you’re facing increasingly complex and repeatable prompts that need to use different tools and MCPs, consider exploring Custom Agents for more advanced automation.
Team Workflow
Treat rule changes like code changes with proper review processes. Use clear descriptions in your frontmatter so team members understand each rule’s purpose and scope.More questions about Zen Rules? Reach out to our community support.