Documentation Index
Fetch the complete documentation index at: https://docs.zencoder.ai/llms.txt
Use this file to discover all available pages before exploring further.
Overview
Zencoder connects to external tools through three integration paths:Native Integrations
Jira integration built into the IDE plugin
Chrome Extension
Send context from 20+ browser-based tools to your IDE
Model Context Protocol
Open standard for connecting agents to databases, APIs, and custom tools
Built-in Native Integrations
Add Jira Integration
The Jira integration lets you reference Jira tickets directly in agent chat using@Jira. Agents can read issue details (summary, description, acceptance criteria) to understand what to build or fix.
Access Integrations
- Click the three dots menu (⋮) at the top right corner
- Select Integrations from the dropdown menu
Connect Your Jira Account
- In the Integrations screen, find the Jira card
- Click Connect to begin the integration process
Authorize Access
- Follow the prompts to authorize Zencoder to access your Jira instance
- You’ll be redirected to Jira to approve the connection
- Once approved, you’ll be returned to Zencoder
Chrome Extension
The Chrome extension adds a Zencoder button to supported browser-based tools. Clicking it captures the current page context (error stack traces, PR descriptions, issue details) and sends it to your IDE.Install the Chrome Extension
Visit the Chrome Web Store and add the Zencoder extension to your browser.
Supported Tools
Project Management
Project Management
- Jira
- Linear
- Trello
- Monday
- Wrike
- Asana
- ClickUp
- Shortcut
- Azure DevOps
Code Repositories
Code Repositories
- GitHub
- GitLab (including self-hosted instances)
Error Monitoring
Error Monitoring
- Sentry
- Datadog
- BugSnag
- Rollbar
- SonarQube
- Snyk
- Grafana/Loki
- LogRocket
CI/CD
CI/CD
- CircleCI
- BuildKite
Frontend Debugging
Frontend Debugging
- Chrome DevTools (with a dedicated tab)
Model Context Protocol (MCP)
MCP is an open standard for connecting LLMs to external data sources and tools. Zencoder acts as an MCP client that connects to MCP servers—lightweight connectors that expose specific capabilities (database queries, API calls, browser automation, etc.). If you need to connect to a system without a native integration, you can use an existing MCP server or build your own.MCP Protocol Support
Supported connection protocols:- Standard stdio communication: For local MCP servers running as subprocesses
- Streamable HTTP connections: For remote MCP servers using HTTP-based communication
- OAuth2 authentication: For secure authentication with third-party services requiring OAuth2 flows
Platform Availability:
- JetBrains IDEs: Full support for all MCP protocols (stdio, streamable HTTP, OAuth2) available from version 2.13 (end of August 2025)
- VS Code: Currently supports stdio connections. Streamable HTTP and OAuth2 support coming soon!
Managing Agent Tools and MCP Servers
MCP servers can be managed through the Agent Tools menu in the IDE, or by editing configuration files directly.- Agent Tools UI (Suggested)
- Manual config (VS Code)
- Manual config (JetBrains)
Access Agent Tools menu
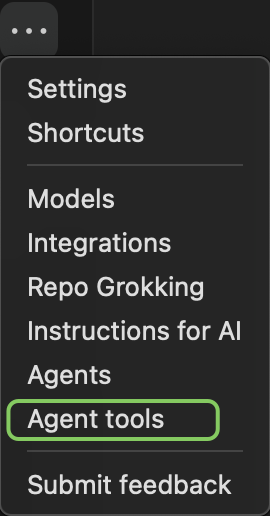
- Click the three dots menu (⋮) at the top right corner
- Select Agent Tools to access the tools management interface
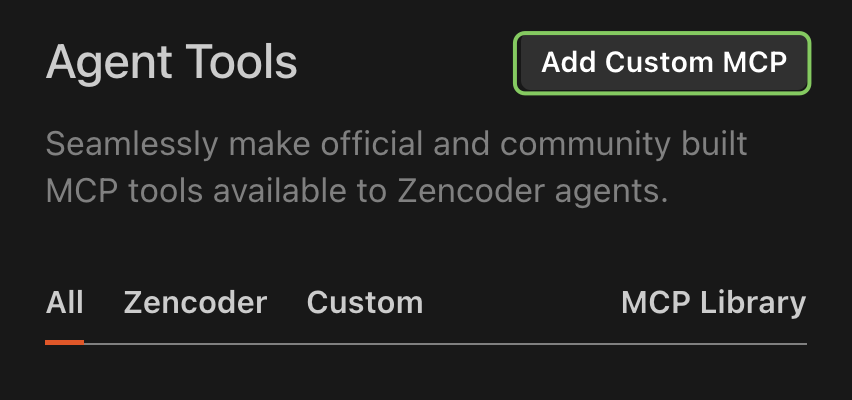
Navigating Agent Tools Categories
At the top of the Agent Tools screen, you’ll find tabs that help you filter and navigate between different types of tools:
- All: Shows all available tools (both Zencoder-provided and custom)
- Zencoder: Displays prebuilt tools created by Zencoder
- Custom: Shows your custom tools and MCPs that you’ve installed
-
MCP Library: Provides a selection of ready-made MCP servers that you can install with a single click and minimal setup

Browse available tools
The Agent Tools interface displays all available tools based on the category you’ve selected, including pre-built MCP servers from the MCP Library and any custom tools you’ve added.
Install from MCP Library
To install a pre-built MCP server:
- Click on the MCP Library tab
- Browse or search through the available MCP servers
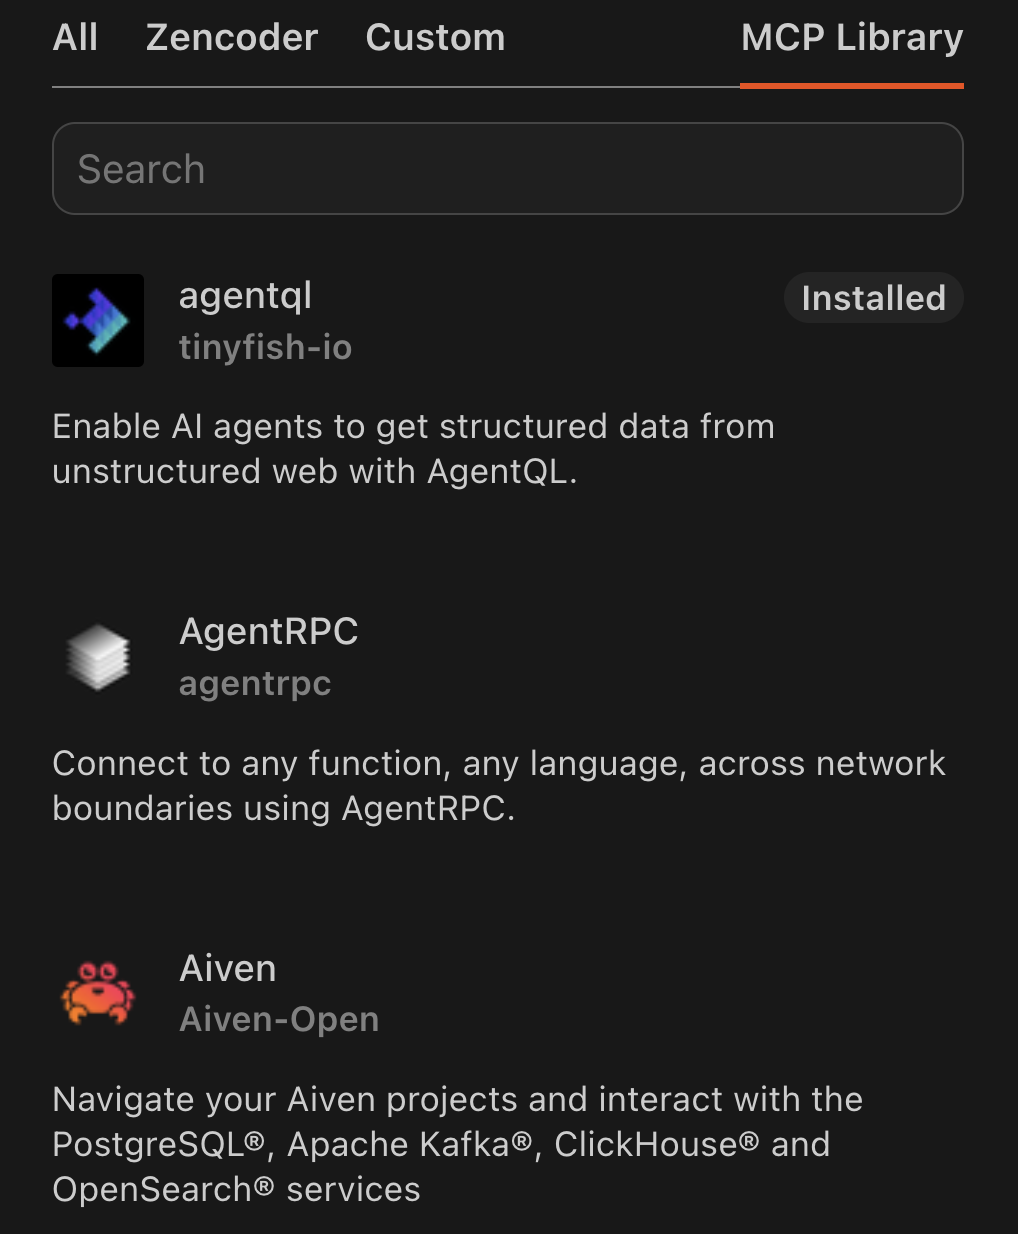
Installed servers will have an “Installed” label next to their name, making it easy to see which MCPs you’ve already added.
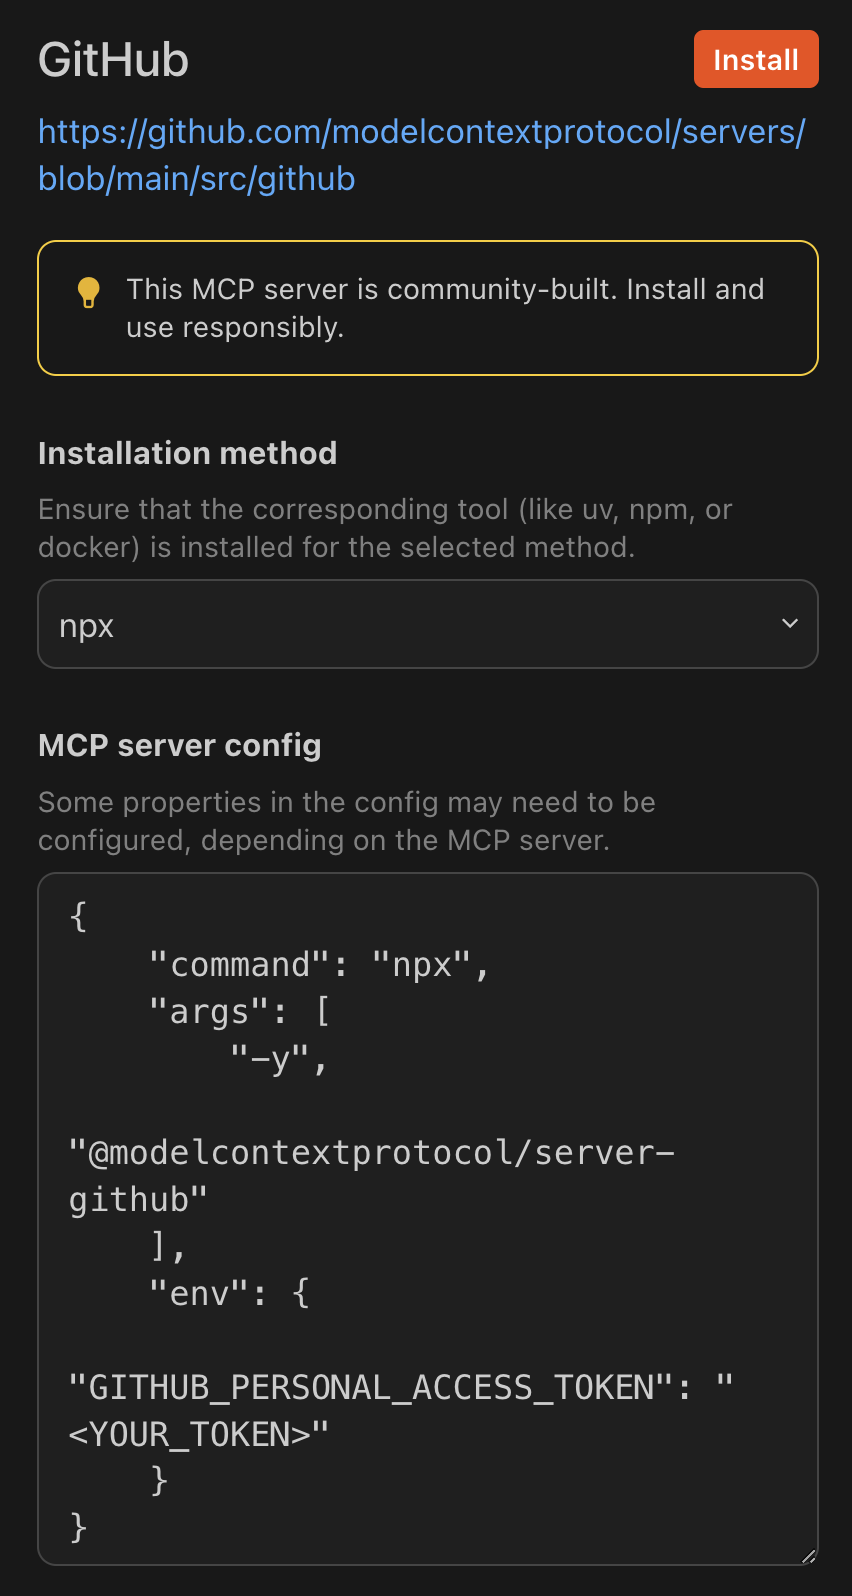
- Click on the MCP server you want to install
- Fill in the required configuration details in the form
- In some cases, you may need to select an installation method (such as Docker or local installation)
- Click the Install button at the top of the form to complete the installation
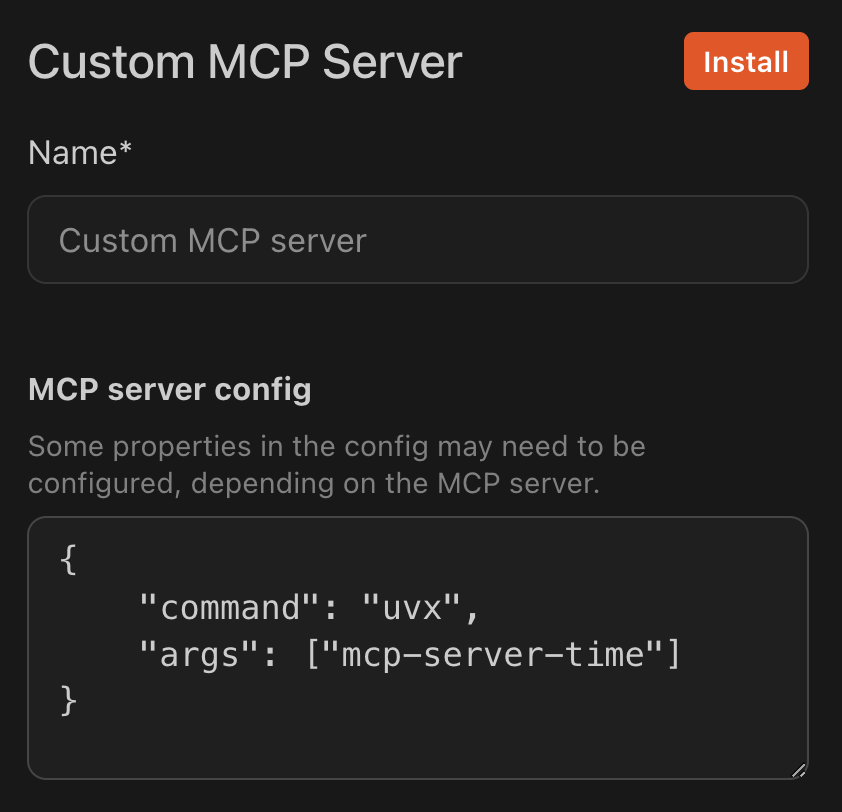
Add a custom MCP server
To add your own custom MCP server:
- Click the Add Custom MCP button
- Enter a name for your MCP and fill in the configuration details
- Click the Install button at the top to add your custom MCP
Manage existing MCP servers
To manage an existing MCP server:
- Click on the MCP server in your list of installed servers
- You will see its configuration details and name
- You can modify these settings as needed
- To completely remove the MCP server, click the Uninstall button
Apply and test your MCP server
After adding an MCP server:
- Make sure Coding Agent is enabled
- Test it with a relevant prompt. For example, if you added the time MCP server, try: “What’s the time in Zagreb right now?”