Contact sales to get this addon functionality. Only available on the Core pricing plan and above - see pricing plans.
Platform Trigger
Events coming from your CI/CD pipeline—such as pull request creation, branch pushes, or scheduled builds—launch autonomous runs through providers like GitHub, GitLab, or Bitbucket.- GitHub Actions
- GitLab CI/CD
- Bitbucket Pipelines
Step 1. Place the workflow file
Step 1. Place the workflow file
Copy the YAML file into
.github/workflows/<workflow>.yml inside the project you want to automate.- 🤖 Agent: Auto-review new pull requests
- 🤖 Agent: Auto-fix reviewer comments on PRs
Step 2. Get your Zencoder credentials and store them
Step 2. Get your Zencoder credentials and store them
-
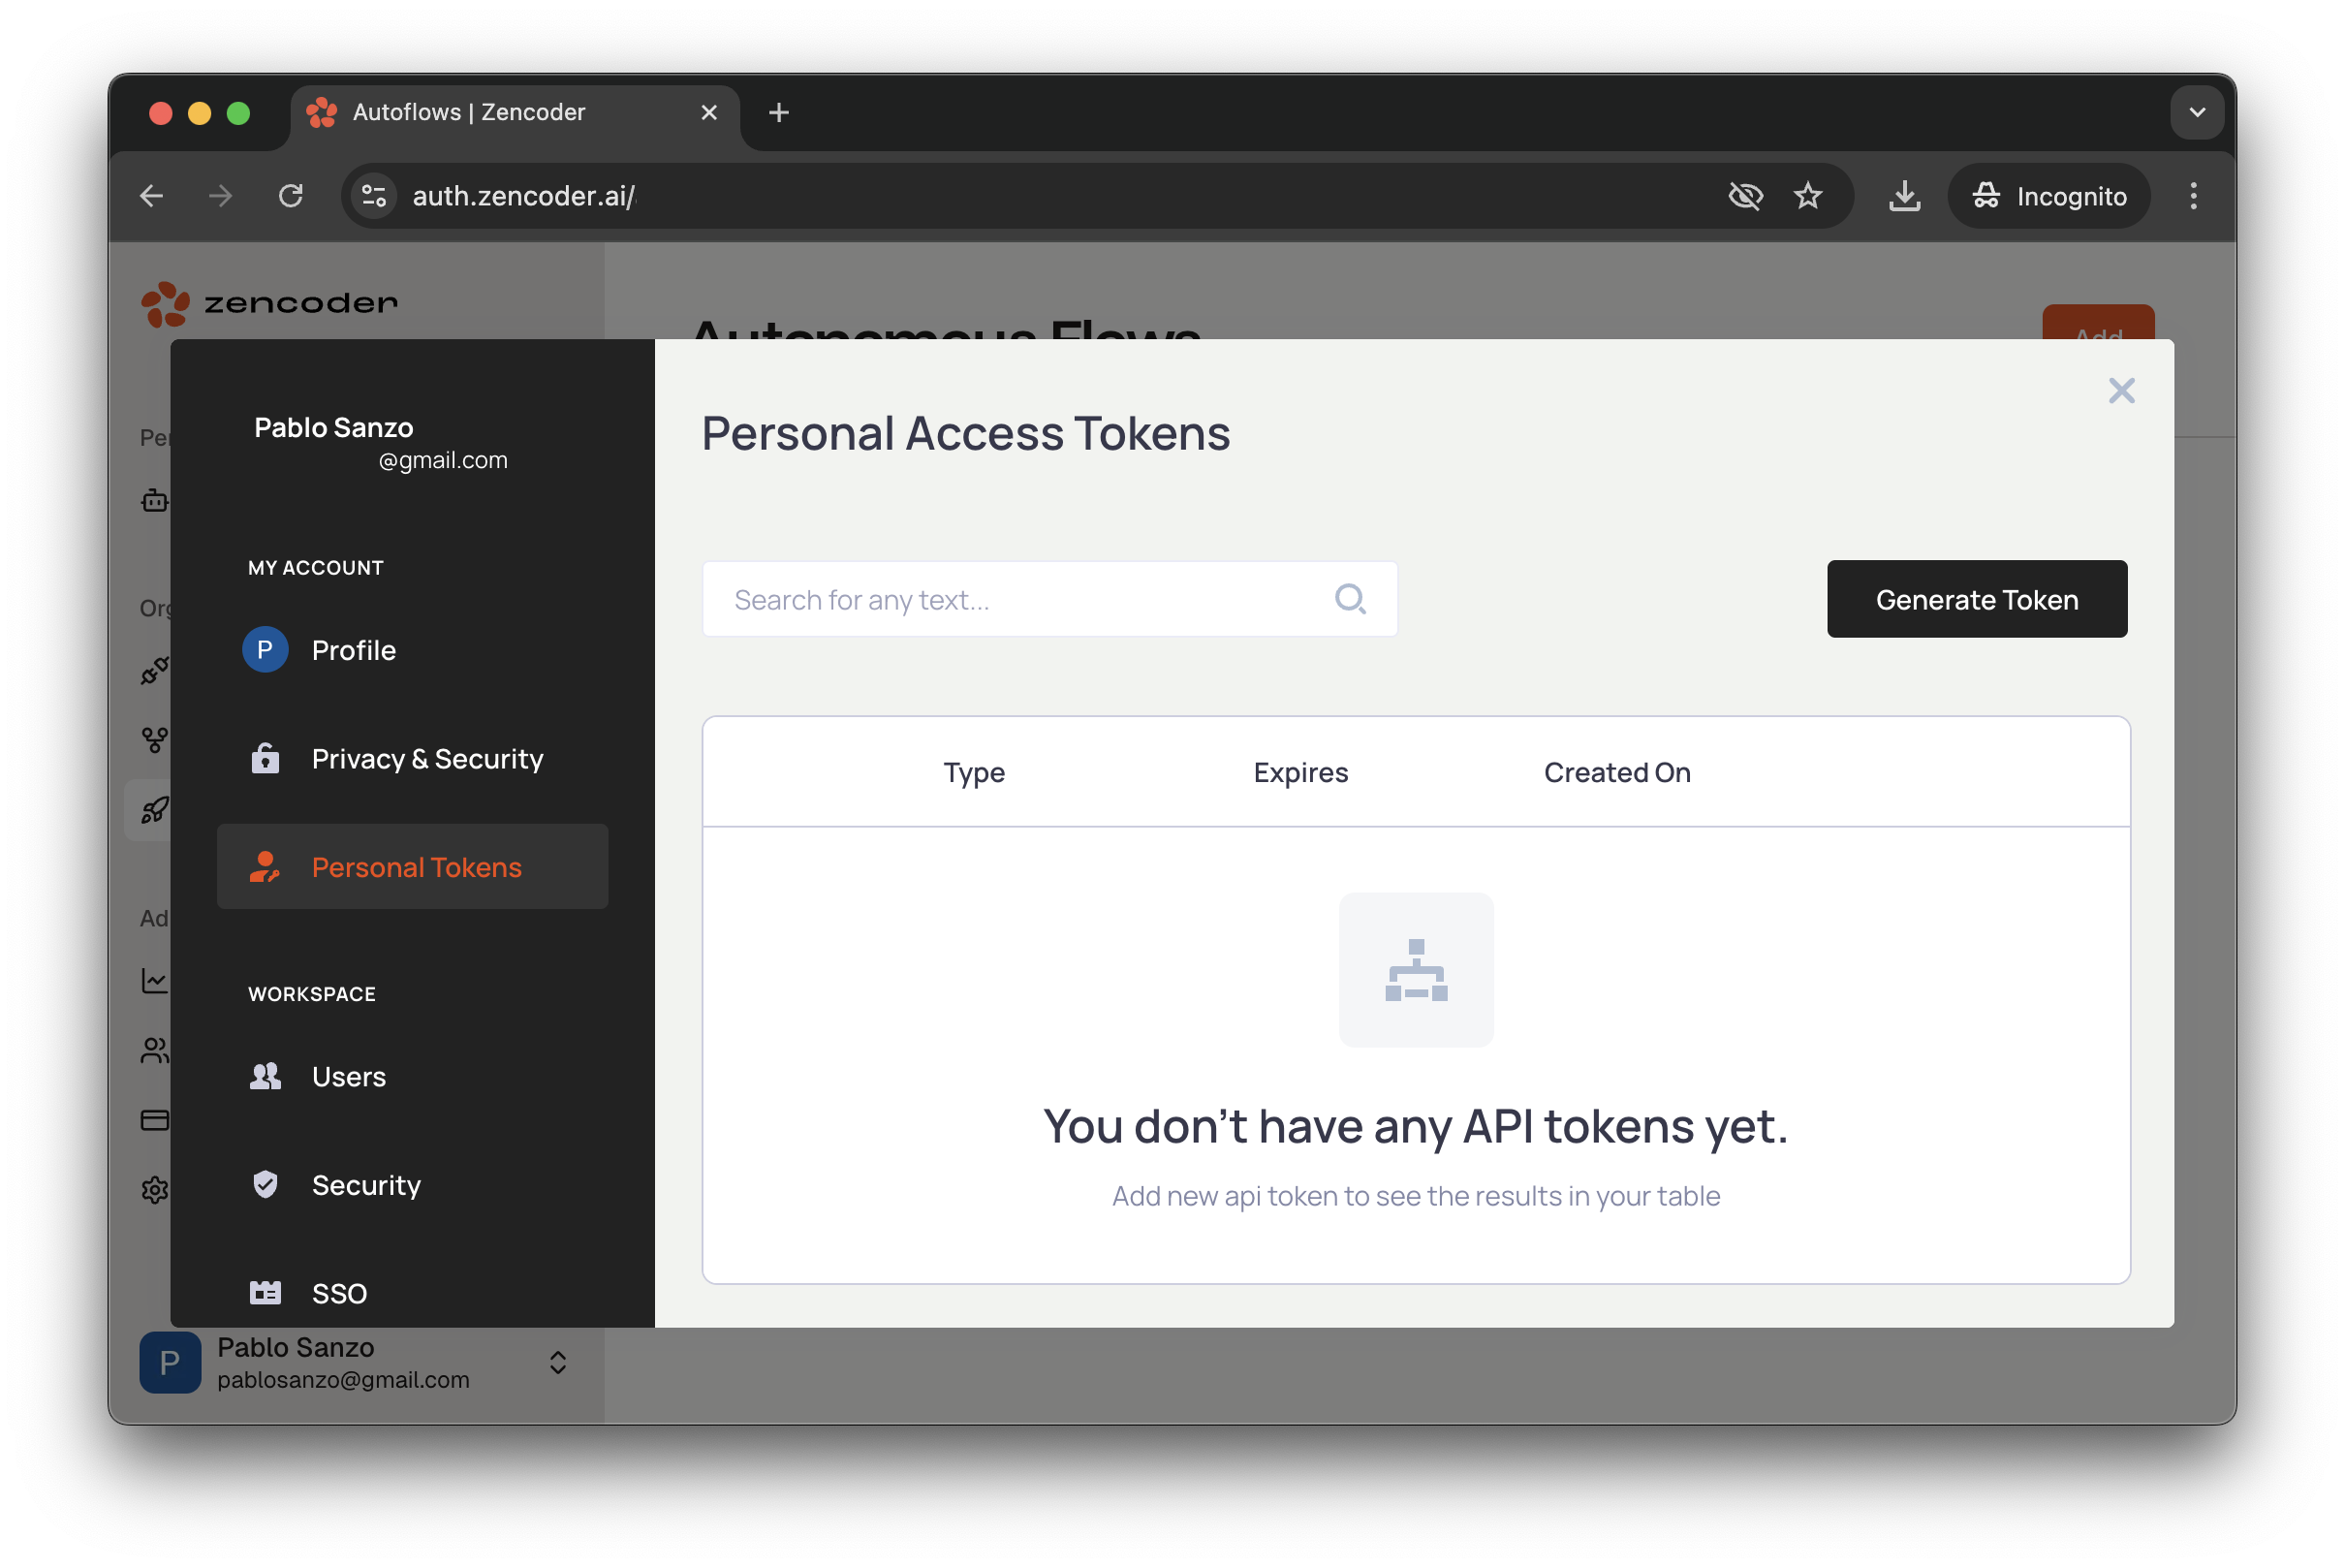
Generate credentials in Zencoder. Sign in to the dashboard (user menu avatar →
Settings→Personal Tokens), clickGenerate Token, add a description, set an expiration date, then clickCreate.
Client ID and Secret Key (map them to ZENCODER_CLIENT_ID and ZENCODER_CLIENT_SECRET) and add both under the repository settings (you can also use organization or environment secrets): open your repo, click the Settings tab on the far right, then Secrets and variables → Actions.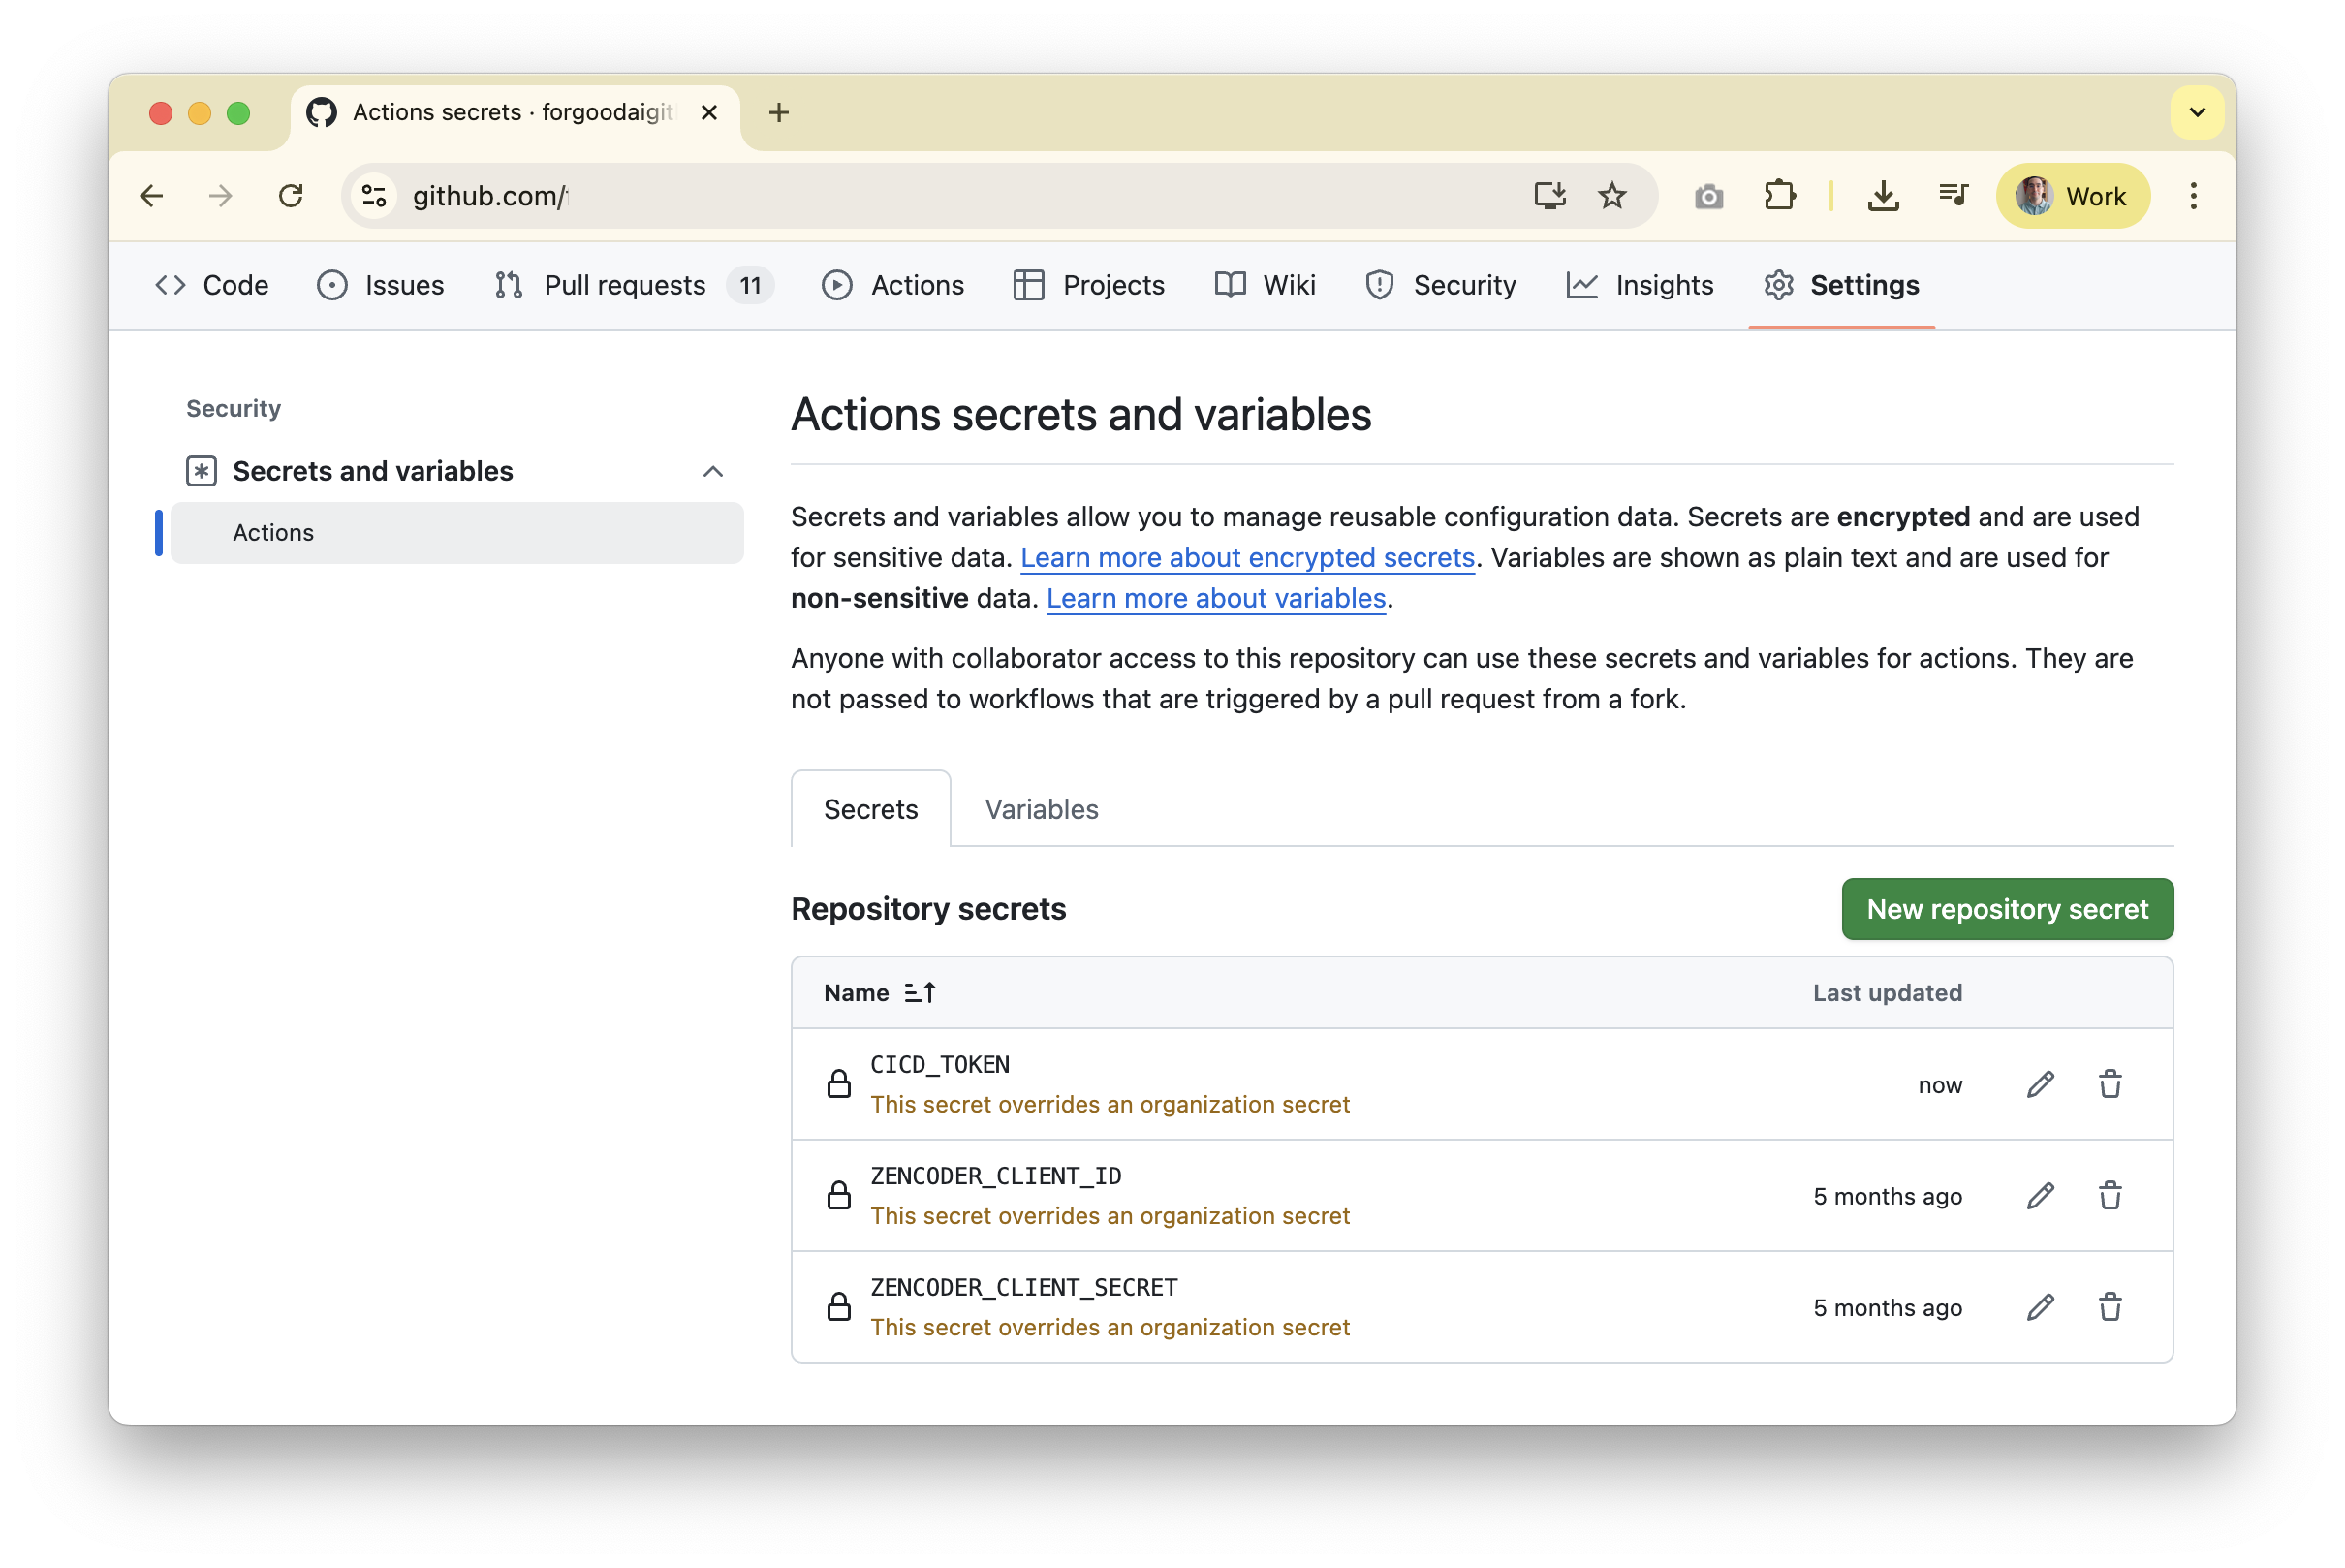
Step 3. Configure the CI/CD token
Step 3. Configure the CI/CD token
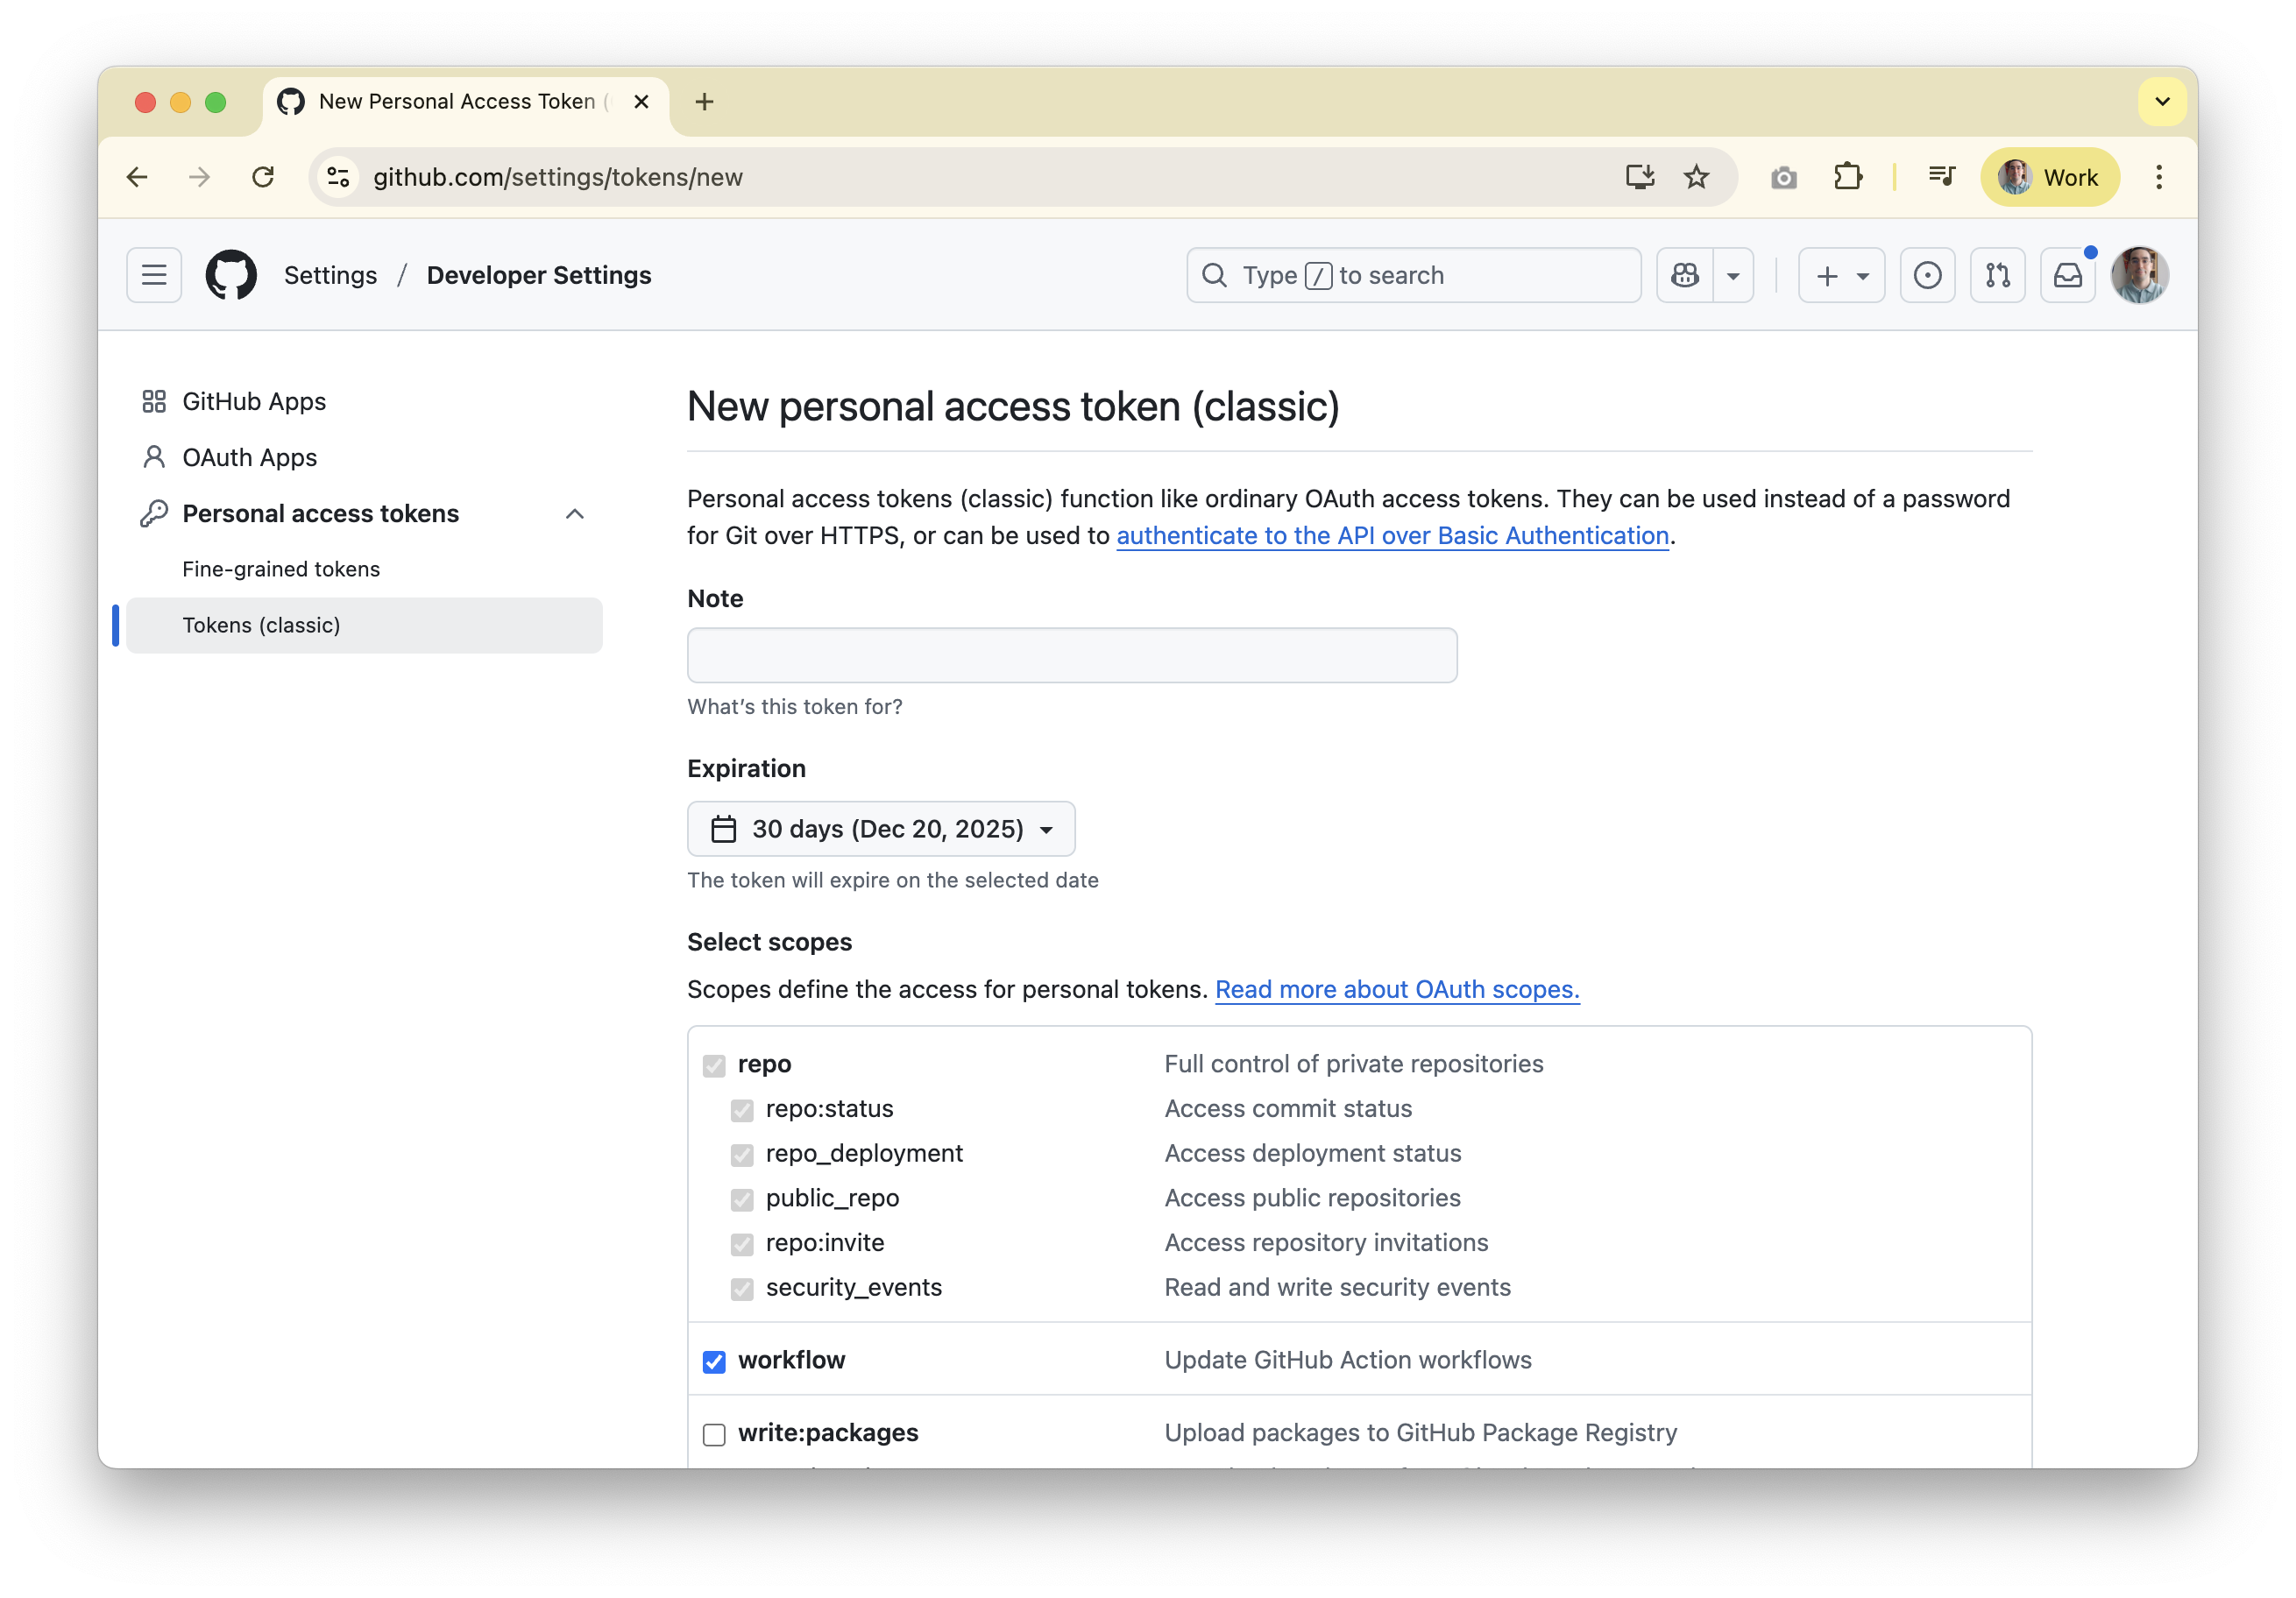
- Generate a GitHub classic token. From your GitHub account (or bot account), open your profile avatar menu →
Settings → Developer settings → Personal access tokens (classic)and create a token with therepoandworkflowscopes so the agent can read code, open pull requests, and run workflows.
Settings tab on the far right, then Secrets and variables → Actions, and create a secret named CICD_TOKEN.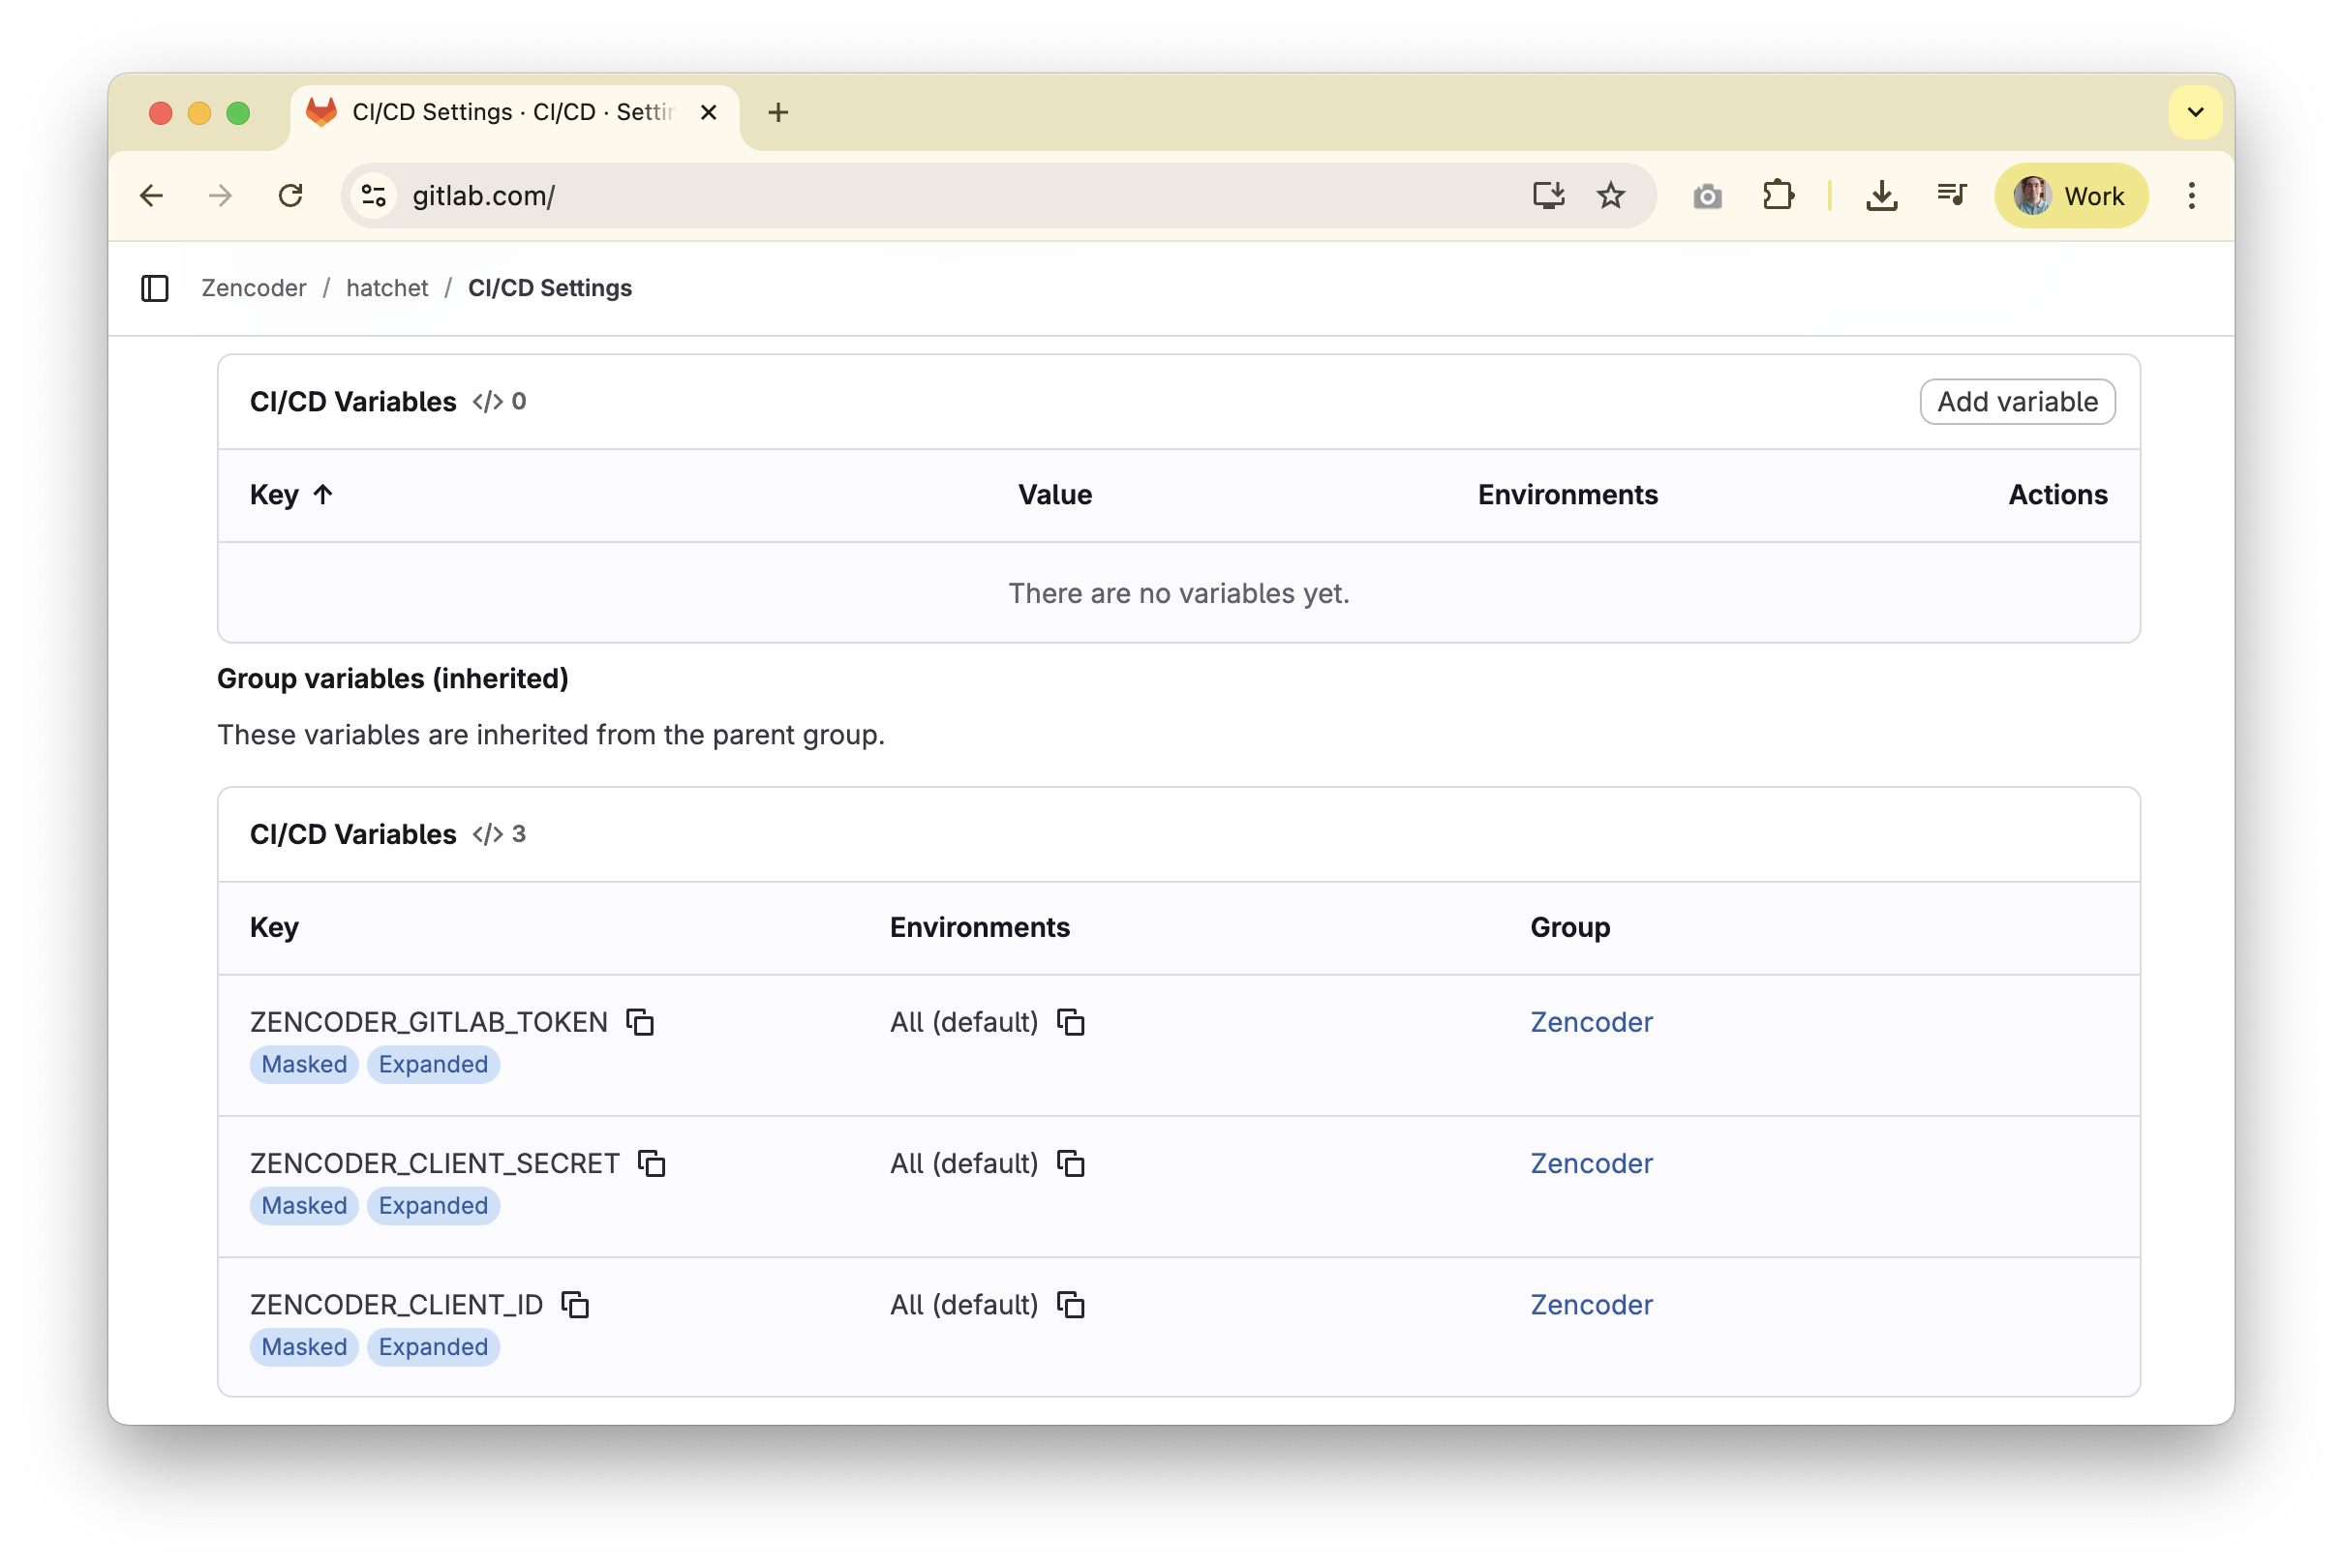
Webhook Trigger
Any app capable of sending an HTTP webhook can start an autonomous workflow, whether it is Jira, Linear, Zendesk, or an internal system that posts to the exposed webhook endpoint.- GitHub Actions
- GitLab CI/CD
- Bitbucket Pipelines
Step 1 uses a webhook-specific workflow file; Steps 2–3 reuse the setup from the Platform Trigger section. If that’s already configured, skip to Step 4.
Step 1. Place the workflow file
Step 1. Place the workflow file
Copy the
Webhook-triggered agent file into .github/workflows/zencoder-agent.yaml (needs to be this exact name) inside the project you want to automate.- 🤖 Agent: Webhook-triggered agent
Step 2. Get your Zencoder credentials and store them
Step 2. Get your Zencoder credentials and store them
-
Generate credentials in Zencoder. Sign in to the dashboard (user menu avatar →
Settings→Personal Tokens), clickGenerate Token, add a description, set an expiration date, then clickCreate.
Client ID and Secret Key (map them to ZENCODER_CLIENT_ID and ZENCODER_CLIENT_SECRET) and add both under the repository settings (you can also use organization or environment secrets): open your repo, click the Settings tab on the far right, then Secrets and variables → Actions.Step 3. Configure the CI/CD token
Step 3. Configure the CI/CD token
- Generate a GitHub classic token. From your GitHub account (or bot account), open your profile avatar menu →
Settings → Developer settings → Personal access tokens (classic)and create a token with therepoandworkflowscopes so the agent can read code, open pull requests, and run workflows.
Settings tab on the far right, then Secrets and variables → Actions, and create a secret named CICD_TOKEN.Step 4. Configure the Autonomous Flow
Step 4. Configure the Autonomous Flow
- Reuse the token from Step 3.
- The classic PAT you created in Step 3 already includes the
repoandworkflowscopes required for the Zencoder connection.
- The classic PAT you created in Step 3 already includes the
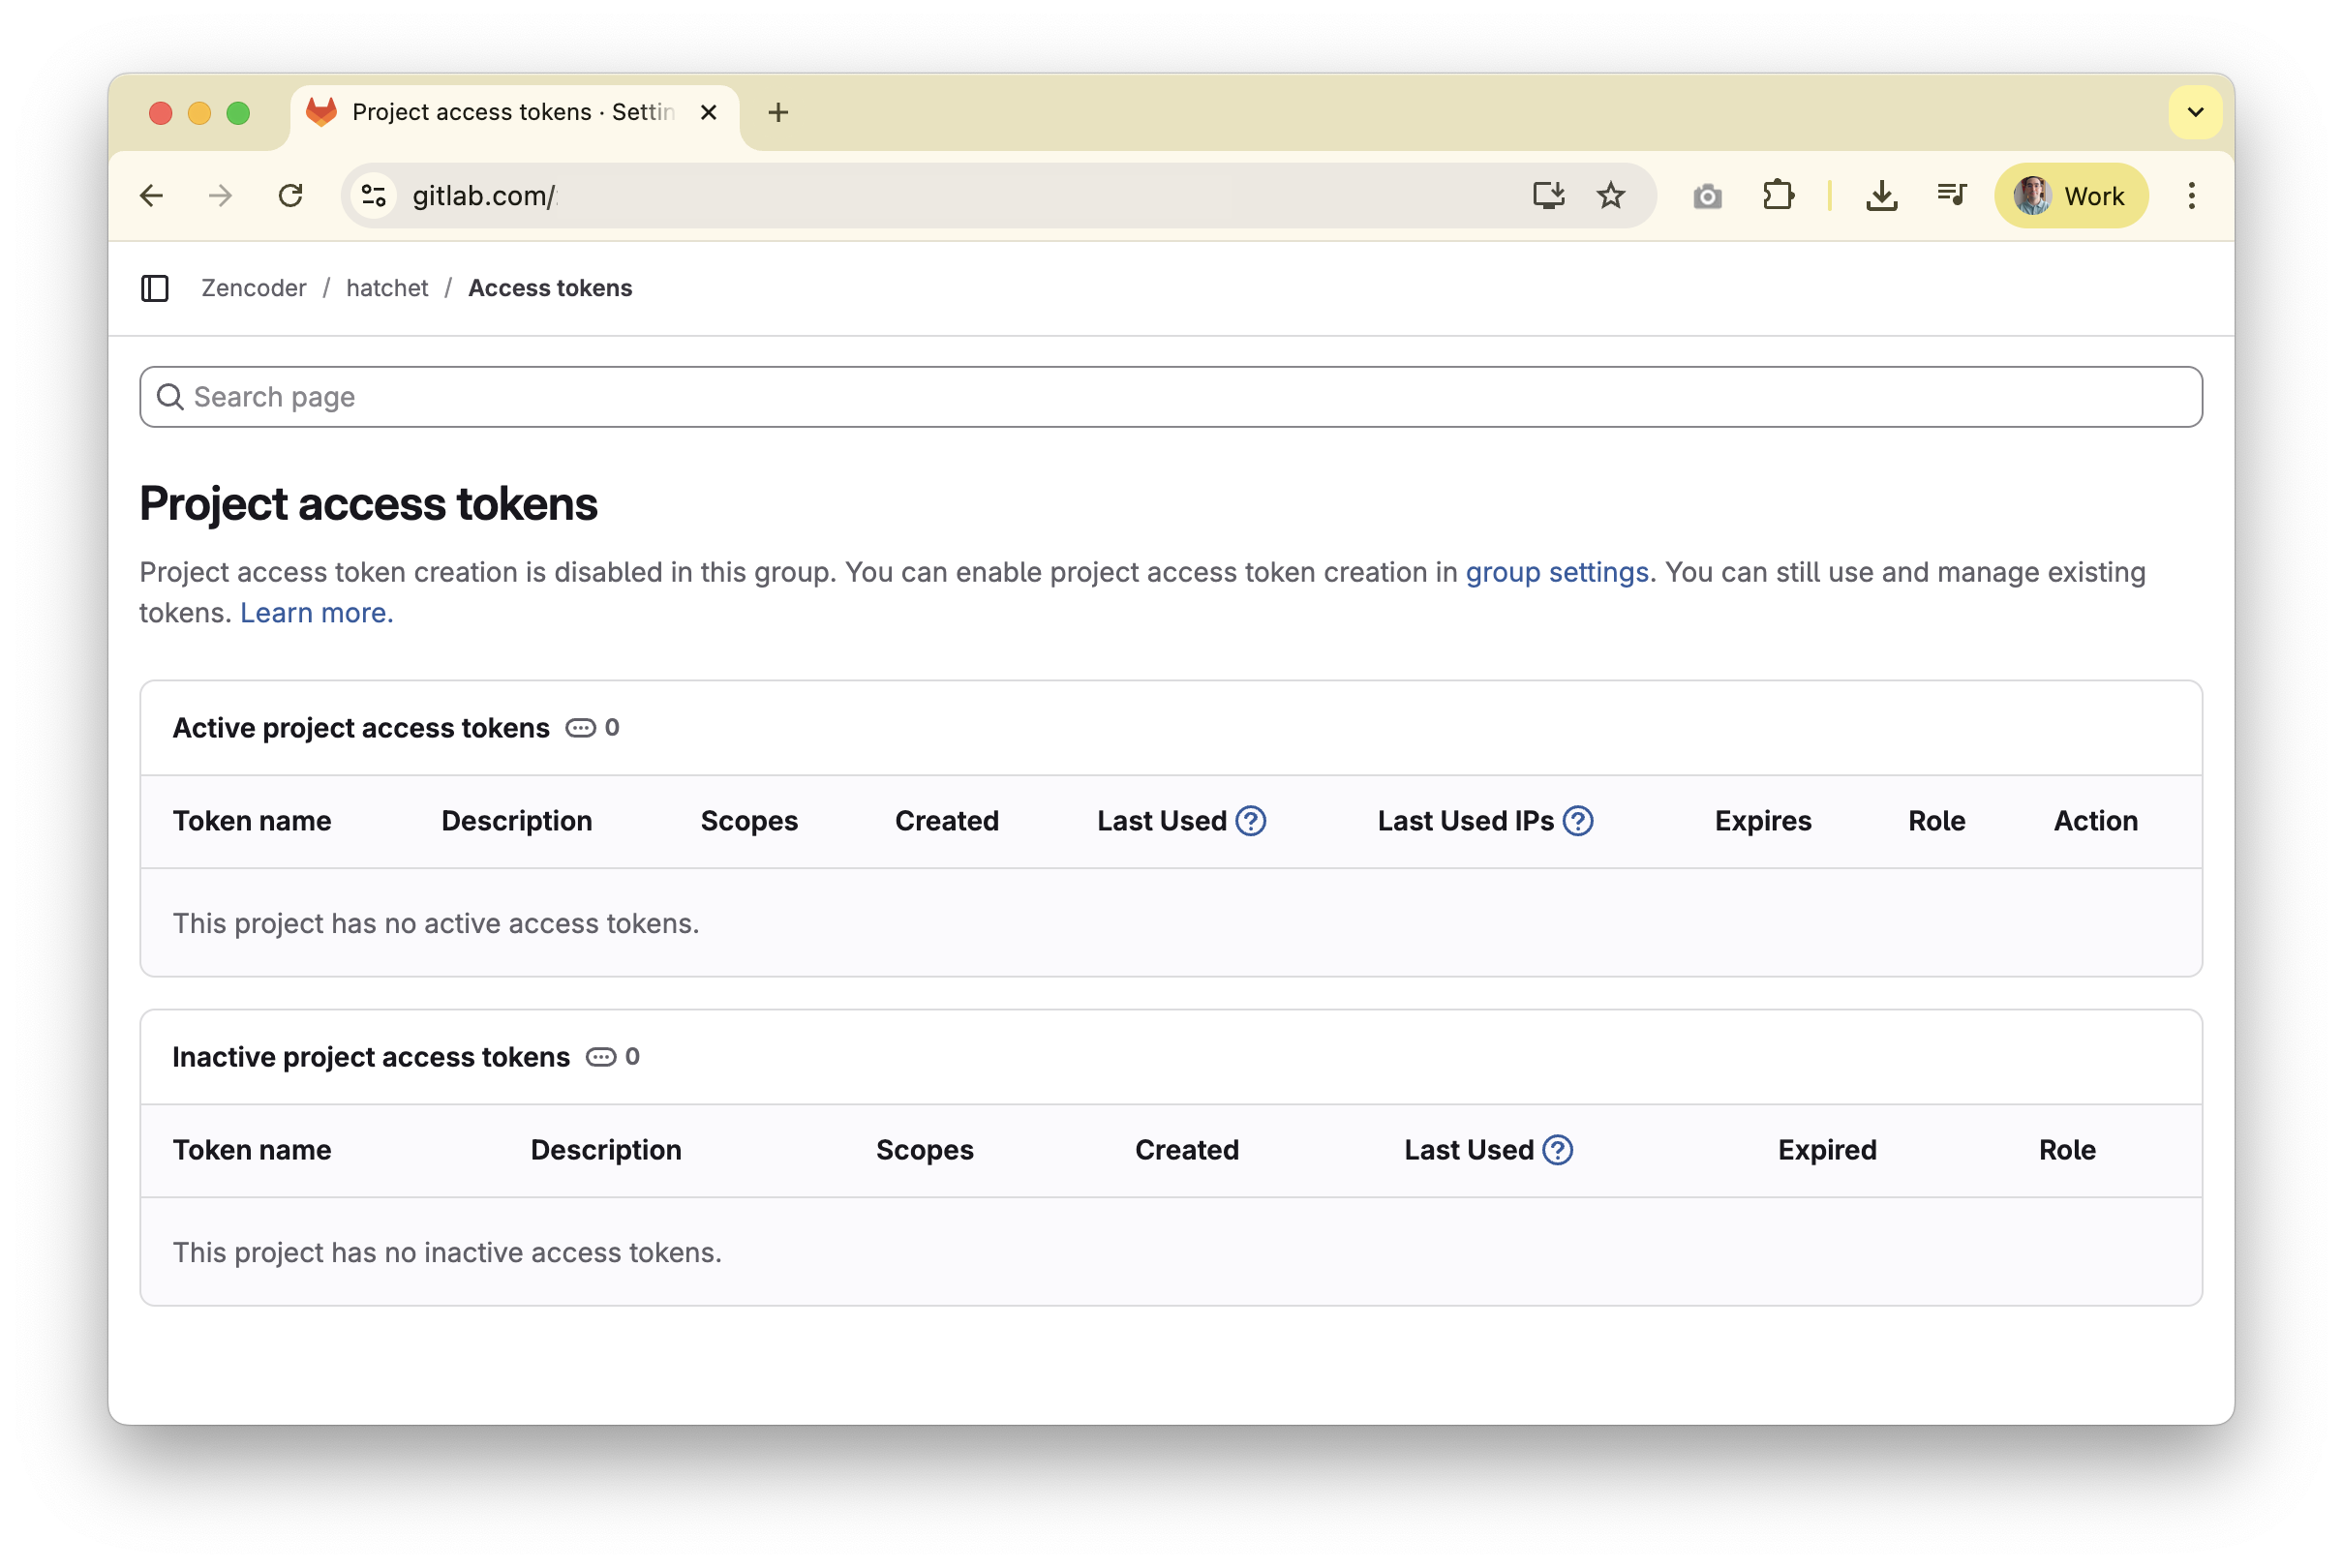
- Connect GitHub to Zencoder. In the Zencoder dashboard, open
Connections, clickAdd Connection, choose GitHub, provide a descriptive name, and paste the token. - Add repositories. Go to
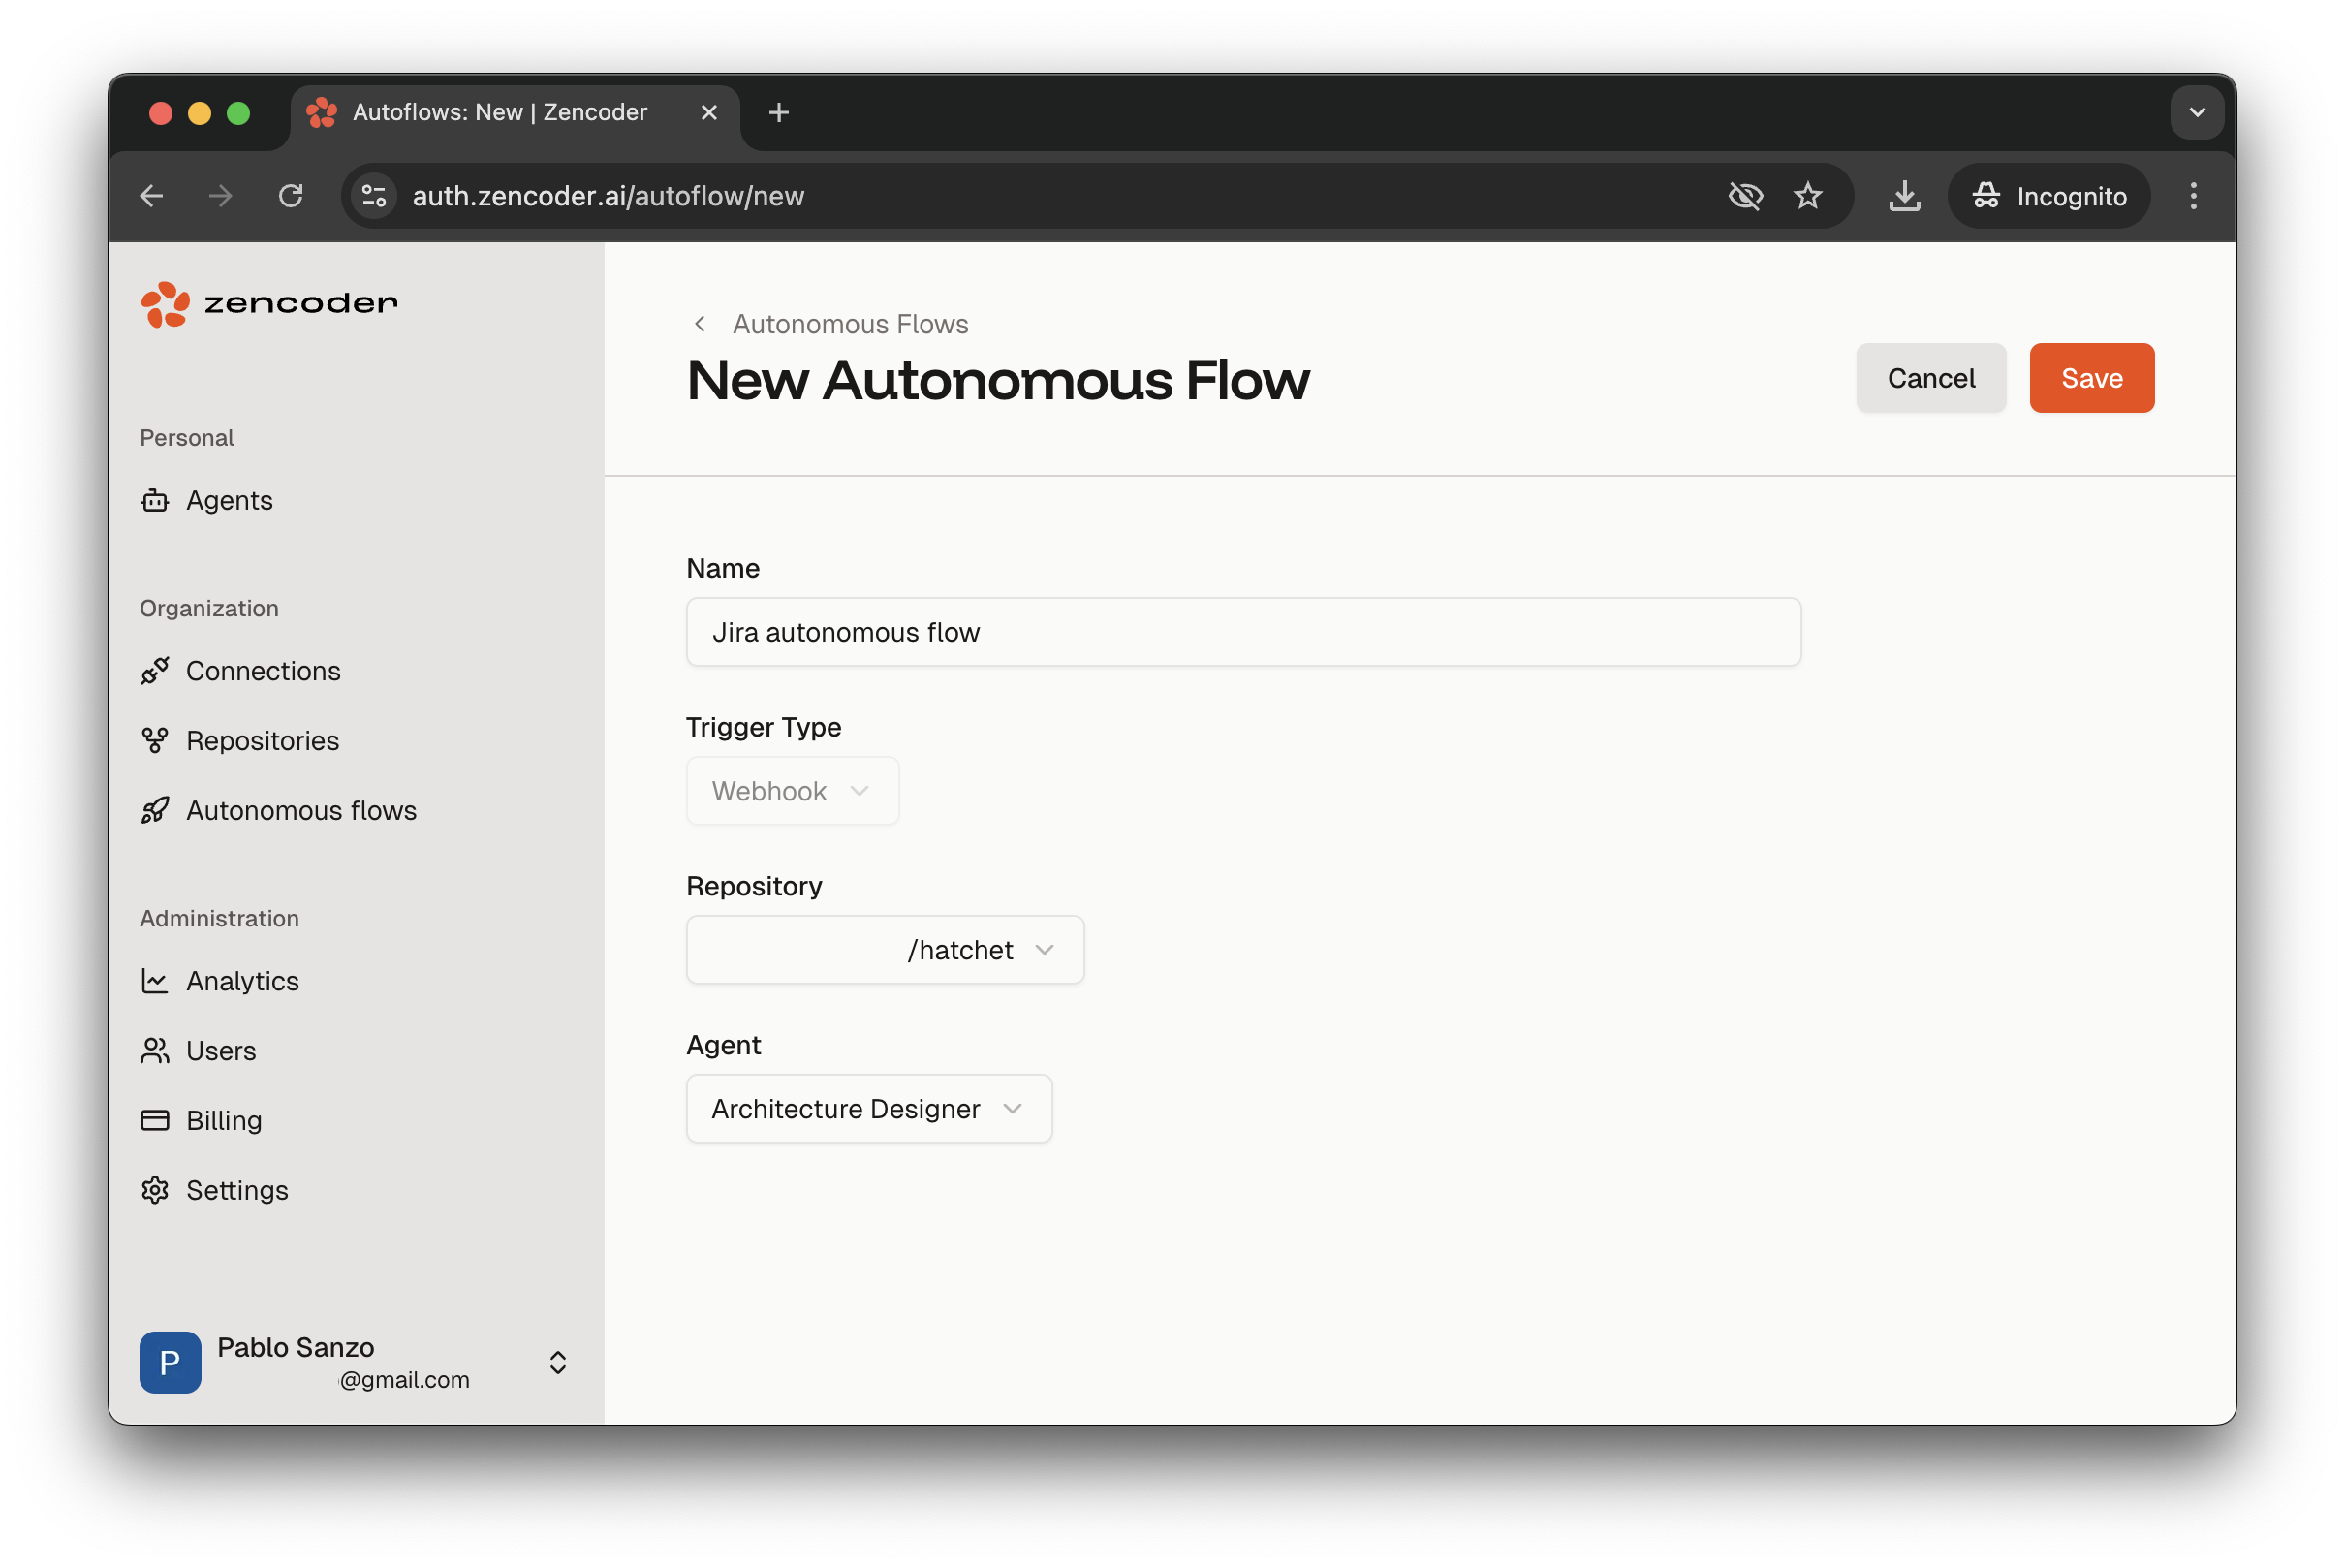
Repositories, clickAdd, select the GitHub connection, give the repository a friendly name, and keep the default options enabled. - Create the Autonomous Flow. Navigate to
Autonomous Flows, clickAdd, name the flow, confirm the trigger type isWebhook, pick the repository you added, and choose one of your custom agents. After saving, the UI displays a Webhook URL and a Webhook Secret—copy both immediately.
Step 5. Configure the webhook trigger (example: JIRA)
Step 5. Configure the webhook trigger (example: JIRA)
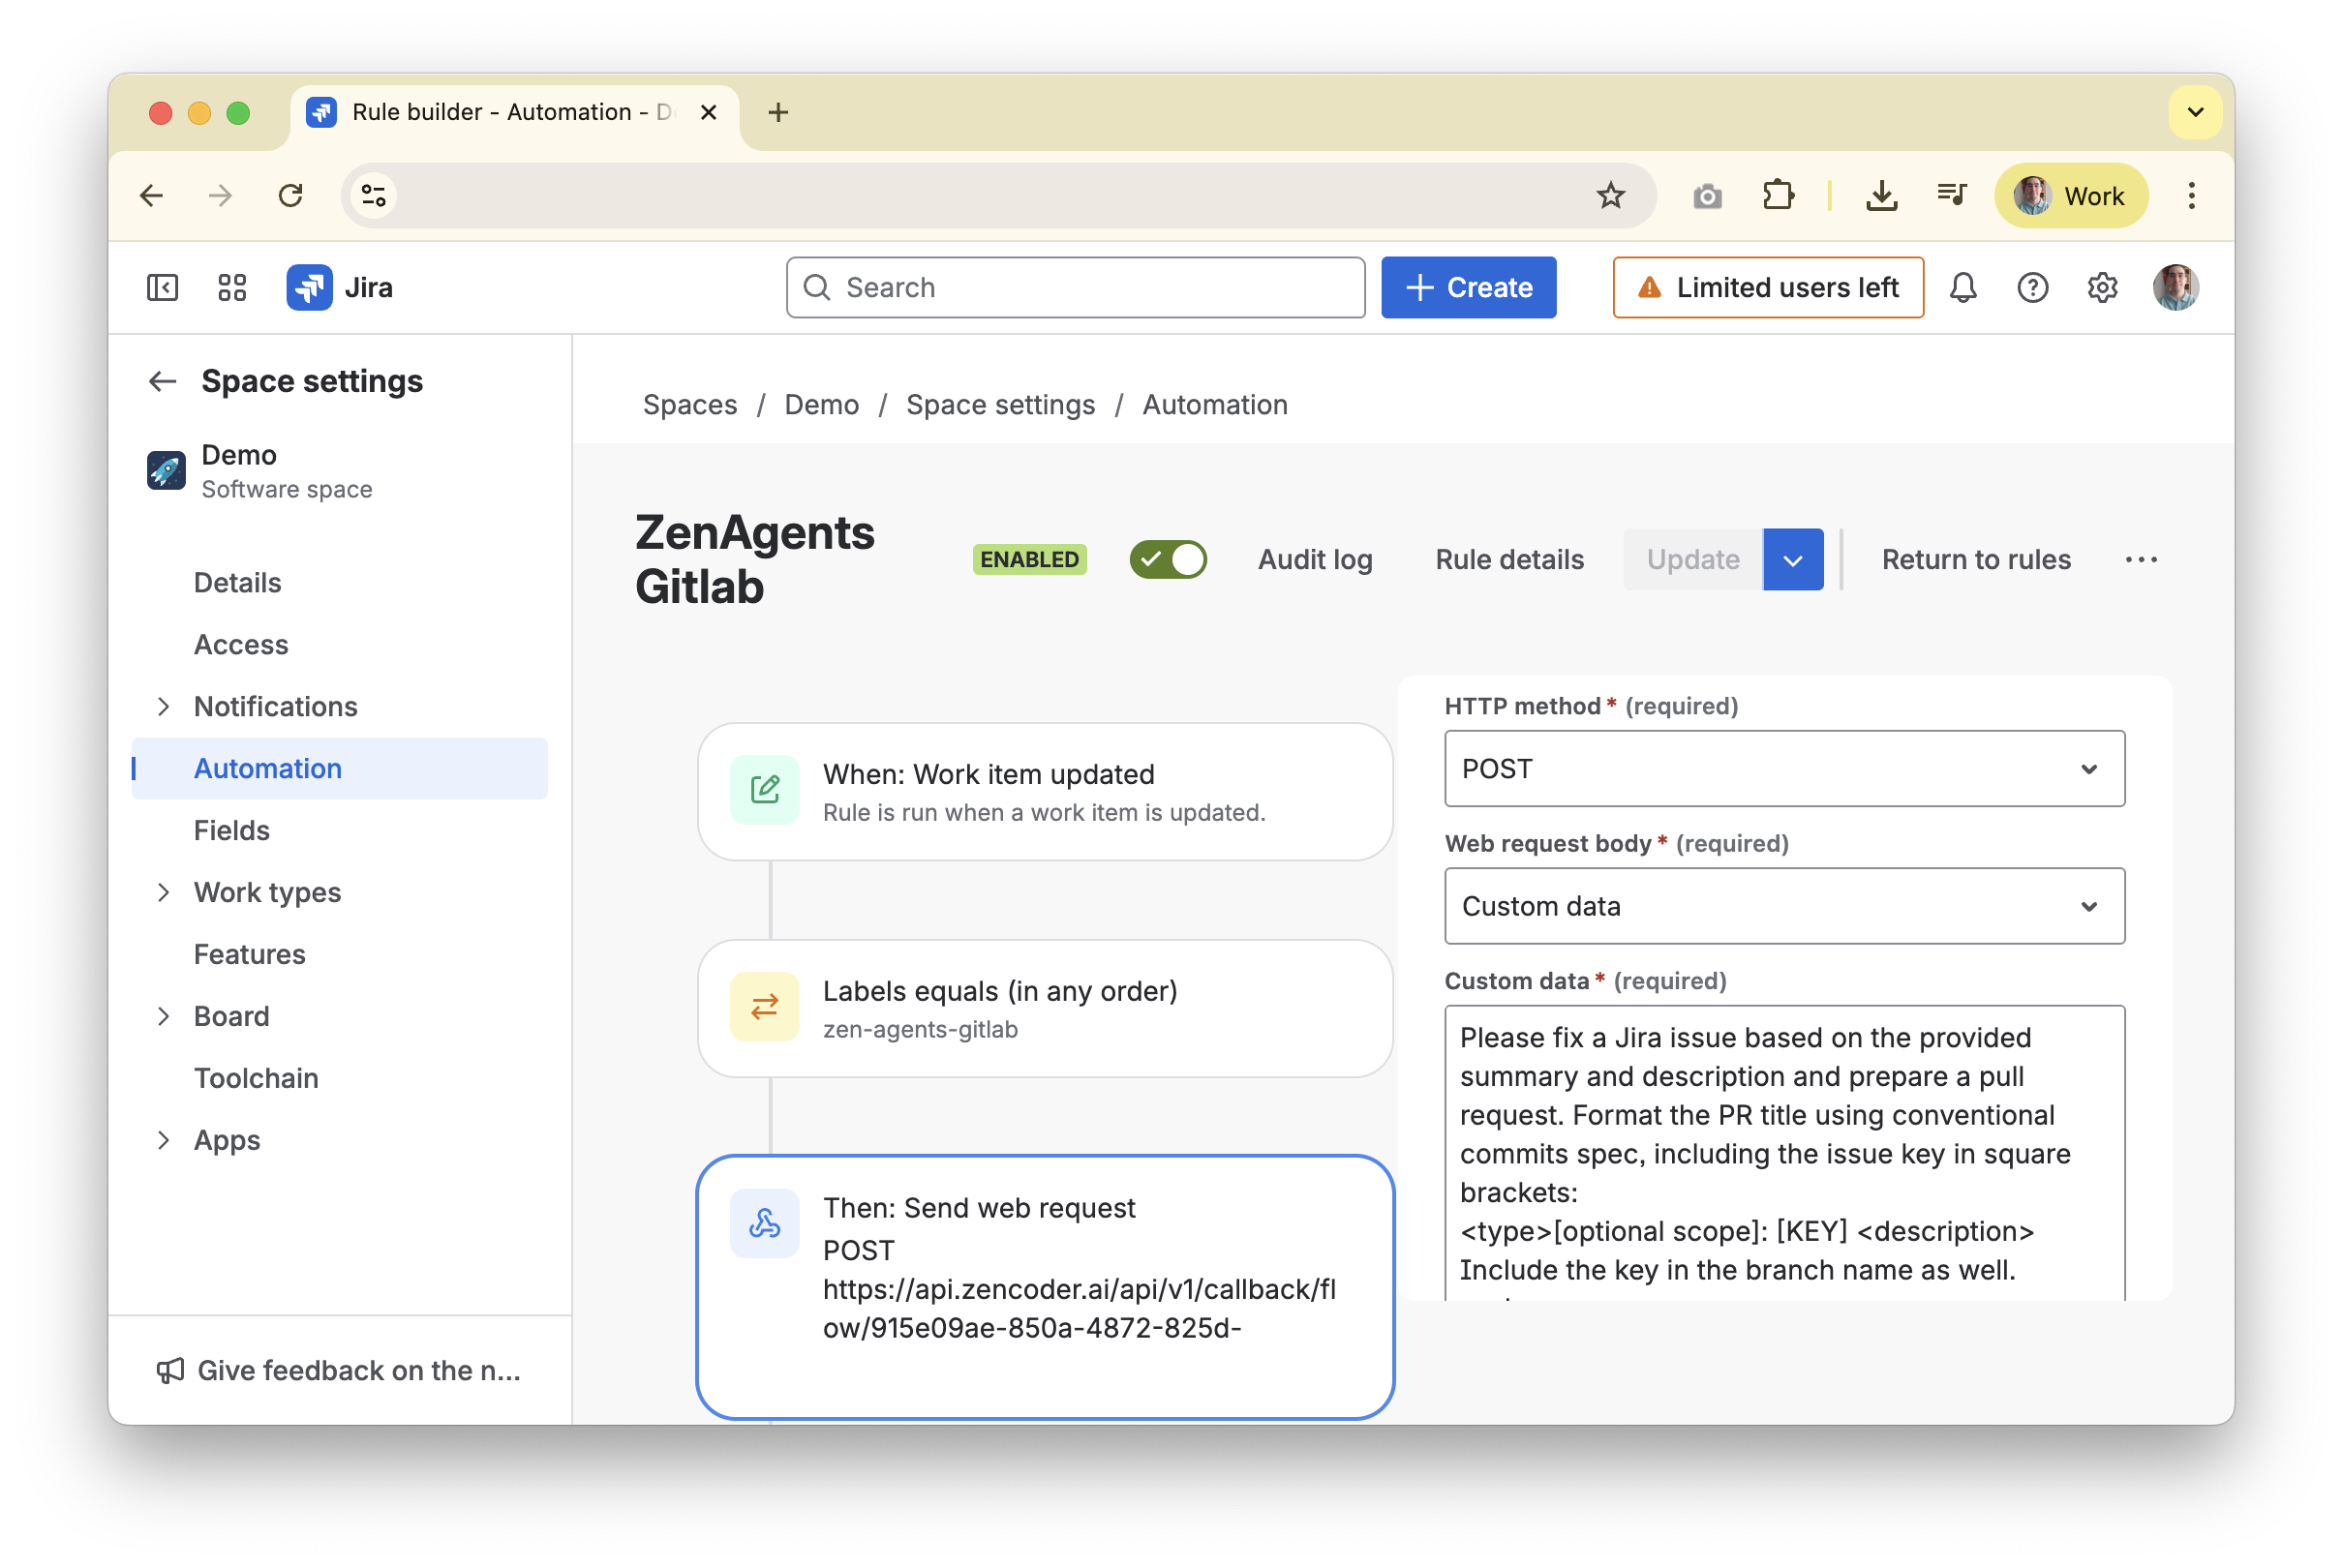
- Create a JIRA automation rule.
- Open
Project settings → Automationin the relevant JIRA project and select Create rule. - Choose a trigger such as Issue updated (adjust to fit your workflow).
- Open
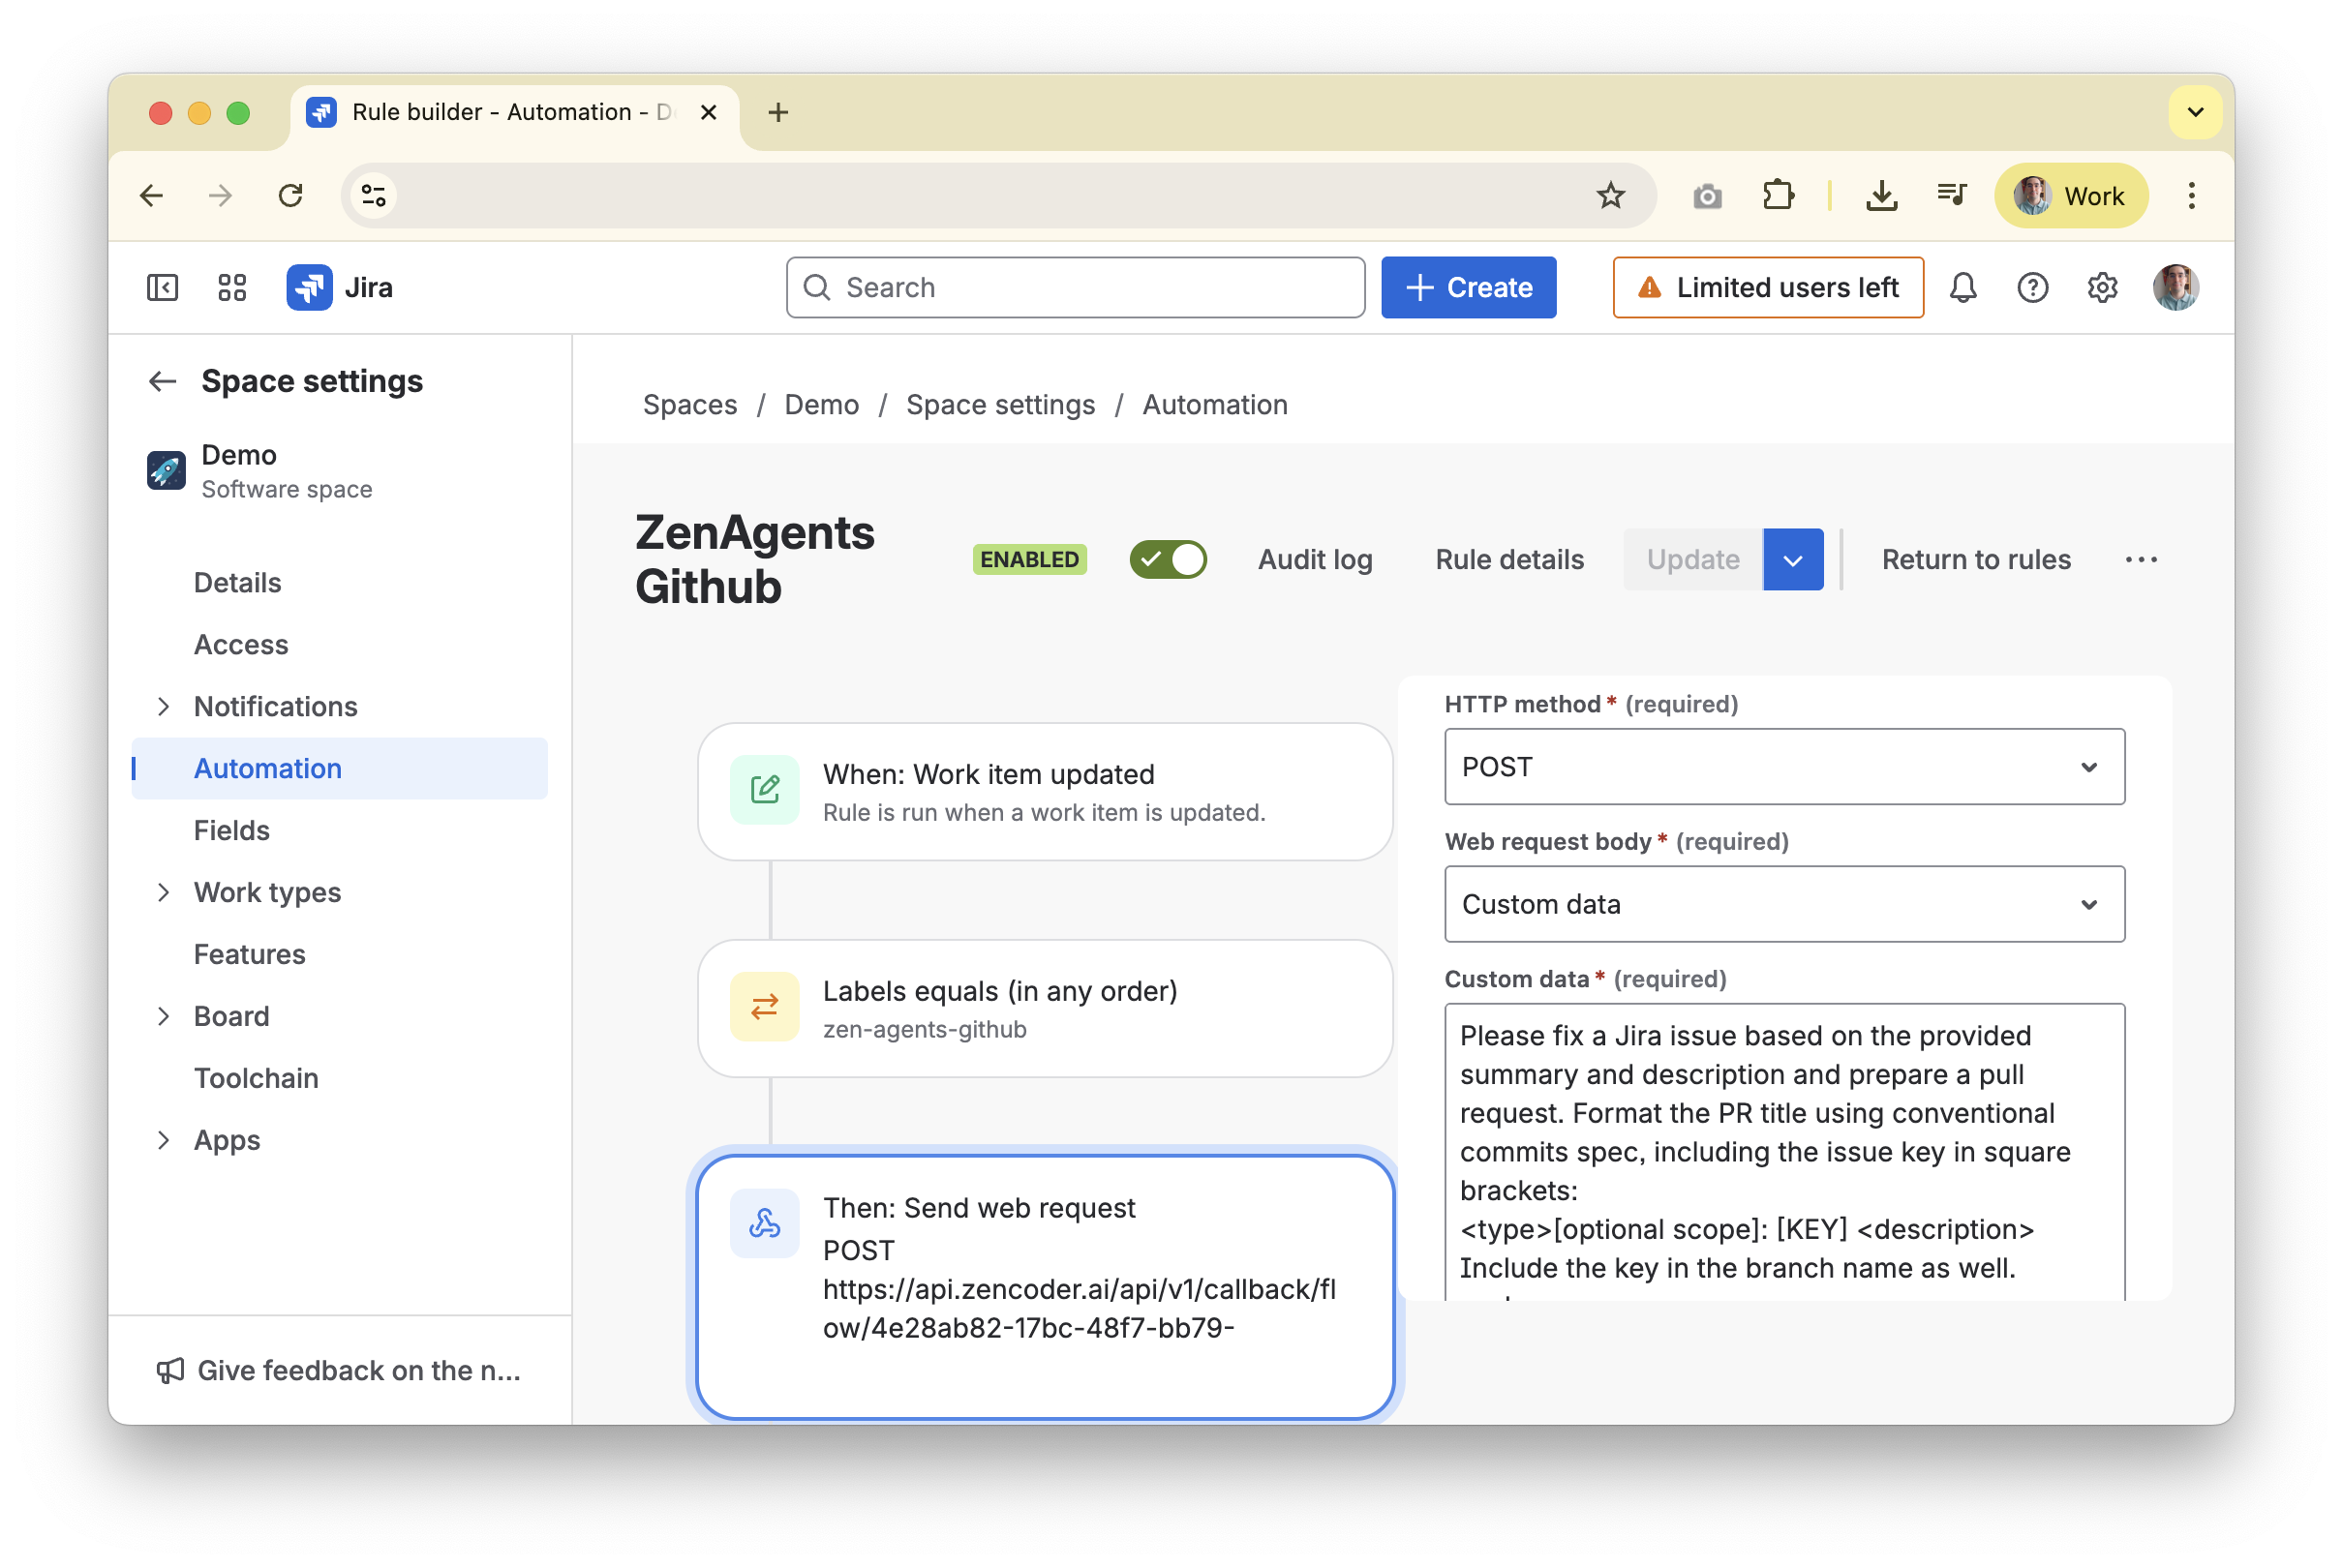
- Example: require a label such as
zen-agents-githubso only tagged issues trigger the automation.
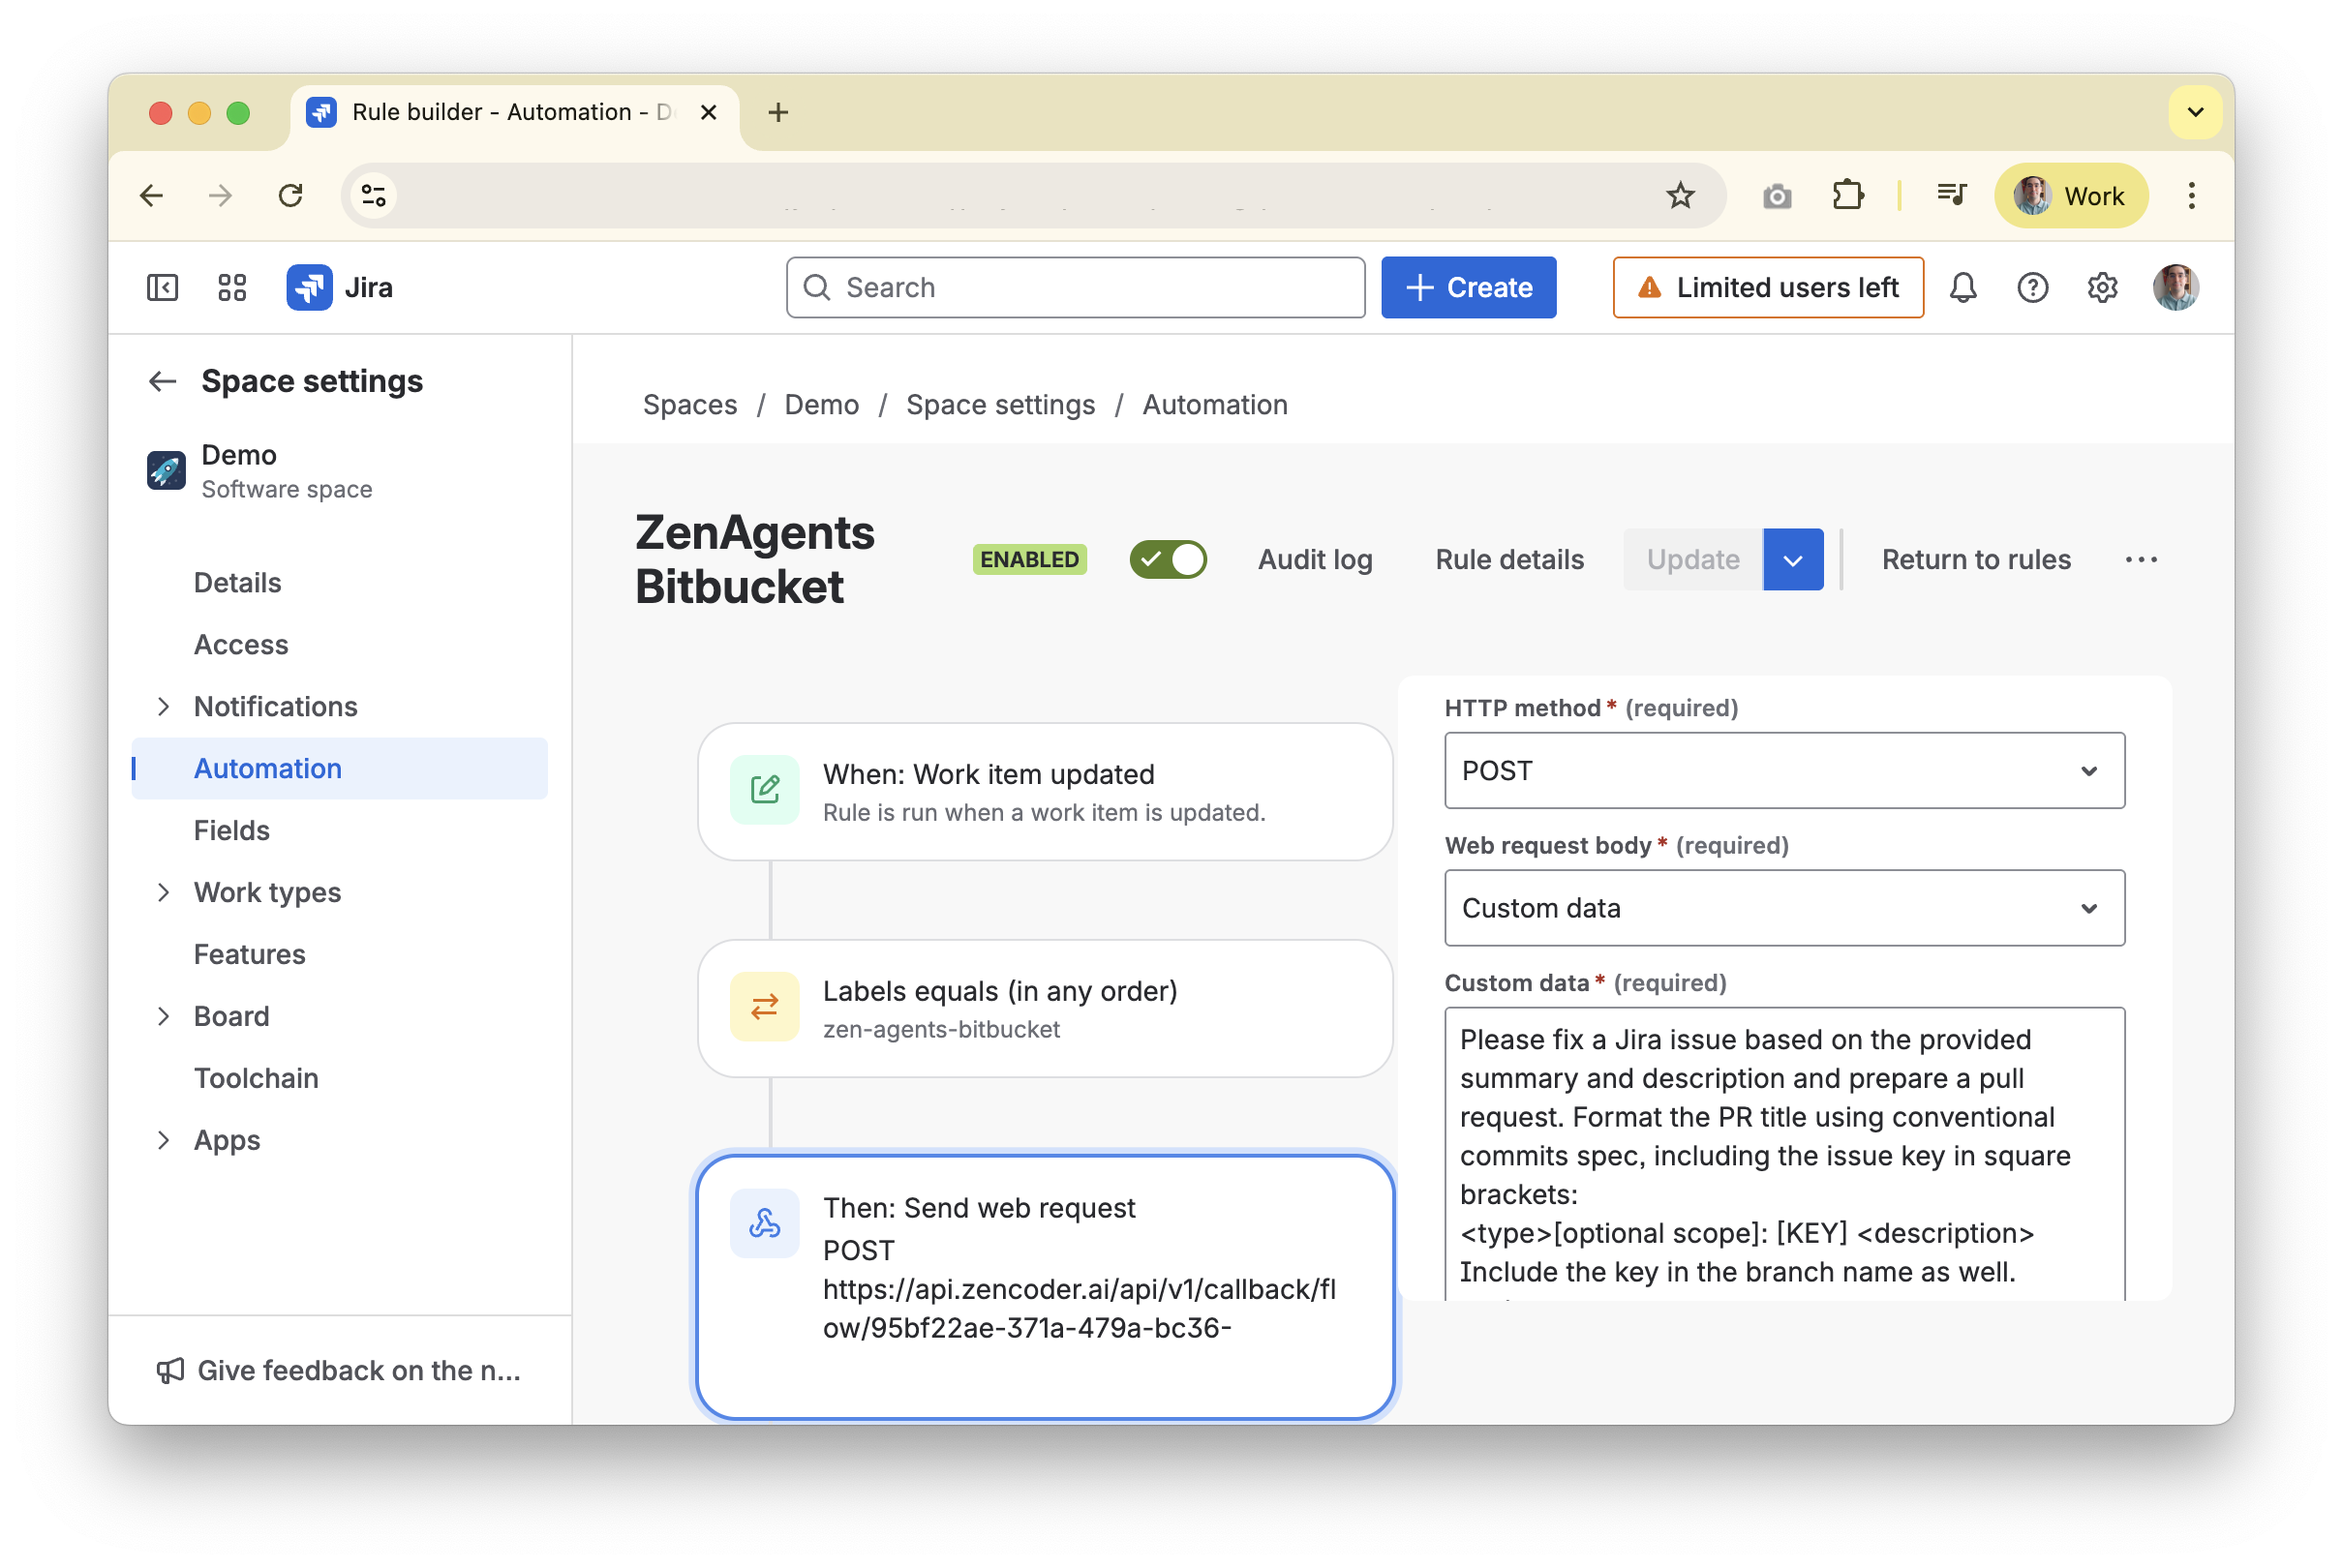
- Send the webhook to Zencoder.
- Add an Action → Send web request step.
- Method:
POST - URL: use the Autonomous Flow webhook URL you copied in Step 4.
- Headers:
X-Zen-Secret: <your webhook secret>
- Insert the payload template.
- Choose Custom data for the body (example below—adjust to your needs) and include the template below to pass issue context to the agent:
- Save and test. Publish the rule and trigger it by updating an issue that matches your condition. Confirm that JIRA logs show a successful webhook call to the Zencoder endpoint.
Workflow Example
Jira-triggered pipeline walkthrough
Jira-triggered pipeline walkthrough
- Developer labels the target Jira issue to signal automation.
- Jira Automation sends a webhook payload to the Zencoder endpoint configured for the autonomous flow.
- Zencoder validates the payload and invokes the matching autonomous flow.
- CI pipeline pulls the latest code, downloads the Zencoder CLI, and authenticates with stored credentials.
- Zencoder agent executes the scripted workflow, implements changes, and opens a pull request with a conventional commit title that references the Jira issue key.
- Team reviews the pull request output and merges when satisfied.
Custom Models & Private Deployments
Autonomous agents use the samesettings.json from Custom Models. Add your local, VPC, or third-party providers there once and they automatically show up when GitHub/GitLab/Bitbucket workflows run—no extra agent work needed.
To keep everything inside your network, follow the Private Deployments steps (especially “configure custom models from local or VPC endpoints”) and simply load the JSON before the agent runs:
Store the raw JSON as a secret (for example
CONFIG) so autonomous flows inherit the same private models defined in it.Broader GitHub Actions snippet
Broader GitHub Actions snippet
See full configuration details for the full JSON examples.
Troubleshooting
- Authentication failures: Confirm client ID and secret values, check token expiration dates, and ensure each platform token has the required repository permissions.
- Agent not found: look for the agent name in the workflow, confirm the agent is shared with your organization, and double-check the agent configuration in the Zencoder UI.
- Webhook not triggering: Validate the webhook URL, ensure the Jira automation rule is enabled, and confirm any filtering labels (for example
zen-agents-bitbucket) match exactly.
Security Considerations
- Credential management: Use each platform’s secret manager, rotate tokens regularly, and scope credentials to the minimum permissions needed.
- Repository access: Grant the least privilege required, enforce branch protection policies, and require human review before merging agent-generated pull requests.