Documentation Index
Fetch the complete documentation index at: https://docs.zencoder.ai/llms.txt
Use this file to discover all available pages before exploring further.
What is ZenFlow?
ZenFlow is a desktop application for orchestrating AI coding agents. You create tasks with descriptions of what to build, and agents handle the implementation in isolated Git worktrees. Tasks run in parallel without affecting your main branch.What You’ll Accomplish
By the end of this guide, you’ll have Zenflow installed, connected to your preferred AI agent (Zencoder, Claude Code, Codex, or Gemini), and ready to start building with AI assistance through spec-driven workflows.Before You Start
Make sure you have:- A code editor: VS Code, IntelliJ IDEA, PyCharm, or another JetBrains IDE
- Admin access: Permission to install applications on your machine
- 5 minutes: Enough time to get everything set up
Step 1: Download Zenflow
- Go to zencoder.ai/download/all
- Click Download Zenflow for your operating system
- Windows: .exe installer downloads automatically
- Mac: Click View all for additional options
Step 2: Install the Desktop App
- Run the downloaded installer
- Follow the installation wizard
- Grant administrator permissions when prompted
- Launch Zenflow from your Applications folder (Mac) or Start menu (Windows)
Step 3: Sign In or Create Your Account
When ZenFlow opens, you’ll see a welcome screen: New user?- Click Sign Up
- Complete registration at auth.zencoder.ai
- Return to Zenflow and sign in
- Click Sign In
- Enter your Zencoder credentials
Step 4: Choose Your Default AI Agent
After signing in, you’ll be prompted to select your default agent:- Zencoder: The native ZenFlow agent (recommended for getting started)
- Claude Code: Anthropic’s coding agent
- Codex: OpenAI’s code generation model
- Gemini: Google’s AI model
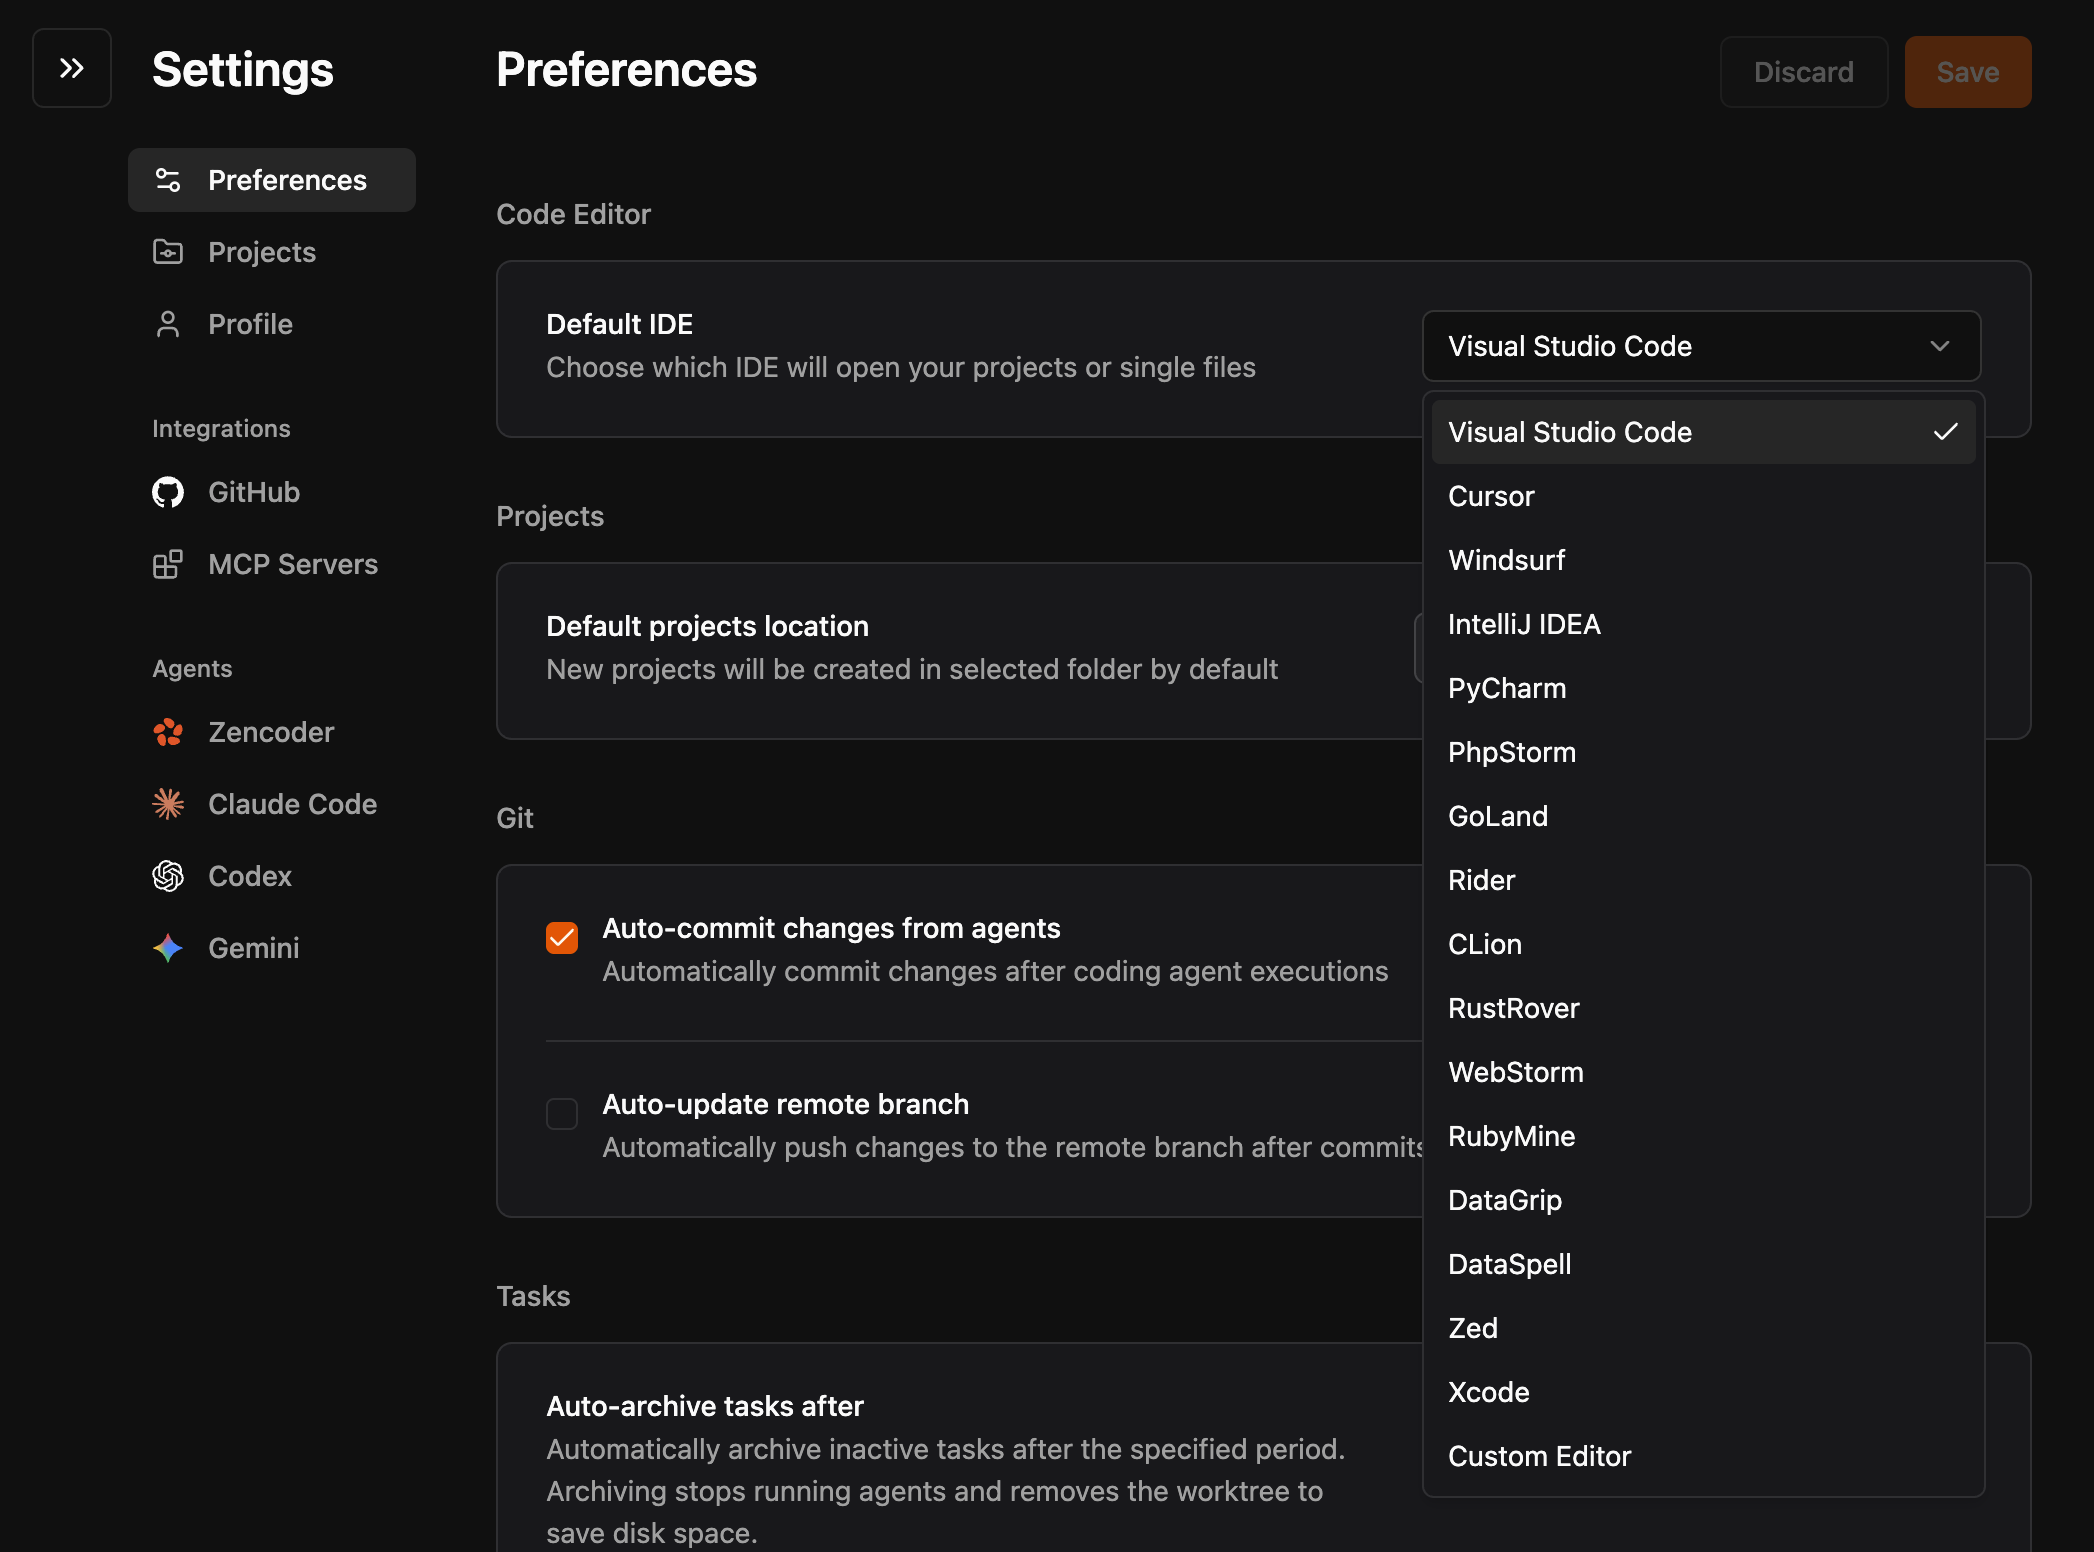
Step 5: Connect Your IDE to Zenflow
Link the plugin to your desktop app:- In the Zenflow desktop app, go to Settings → Preferences - Code Editor
-
Select your IDE from the list
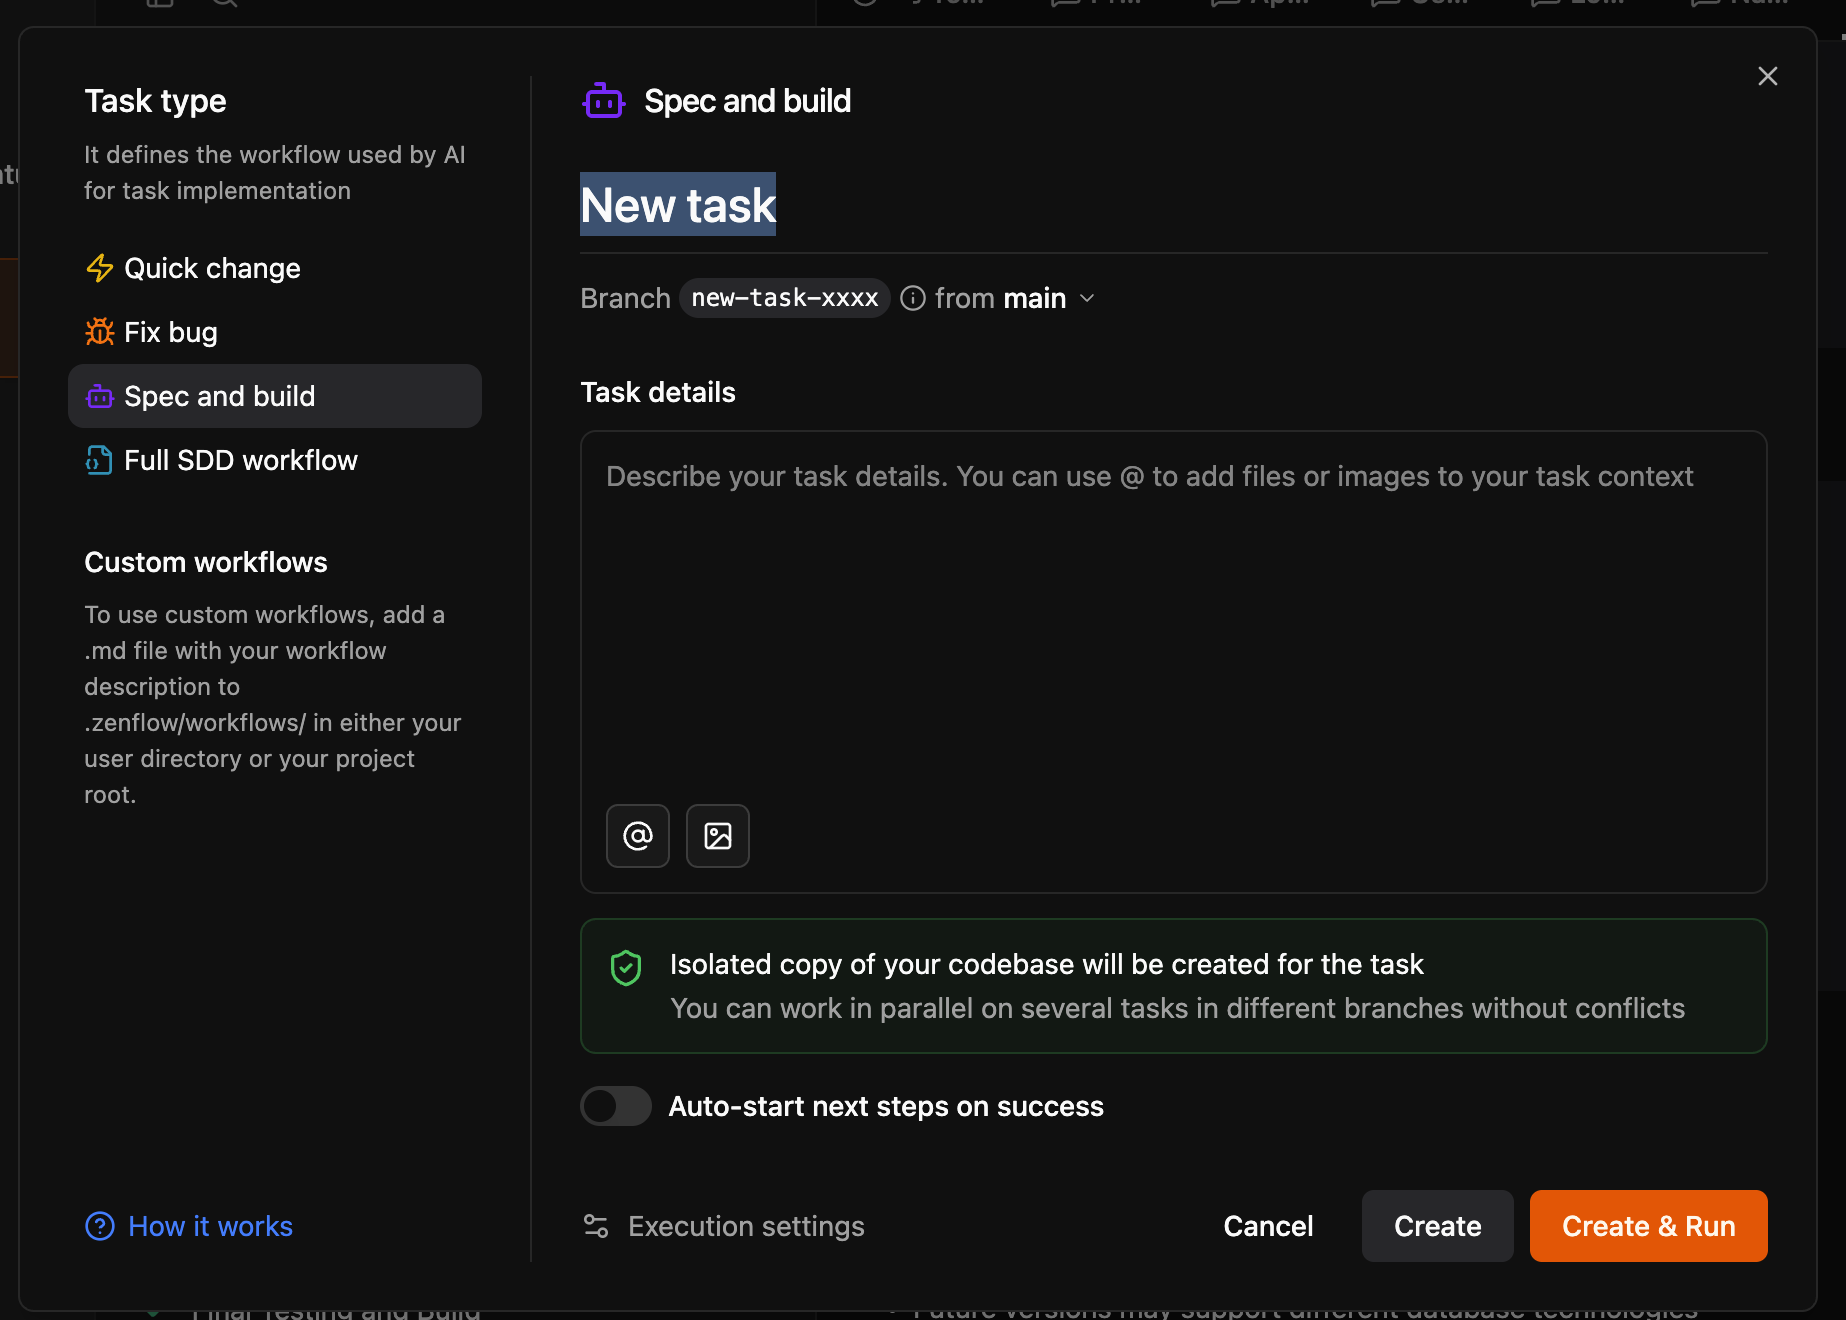
Step 6: Create Your First Task
Now you’re ready to use Zenflow’s AI agents:- In the ZenFlow app, click + New task
-
Choose a workflow type:
- Quick change: For small, focused modifications
- Fix bug: For debugging and fixing issues
- Spec and build: For feature development (recommended for first try)
- Full SDD workflow: For complete software design documents
- For your first task, select Spec and build
- Click Start and describe what you want to build
-
Click Create & Run to start the process
- Ask clarifying questions about unclear requirements
- Create a technical specification
- Plan implementation steps
- Build the feature step by step
- Allow you to review results before merging
Success Checklist
Your setup is complete when:- Zenflow desktop app is running and connected
- You’ve selected a default AI agent
- You can create and start new tasks in Zenflow
Understanding Zenflow’s Workflow Types
Quick change: Fast iterations on existing codeFix bug: Debug issues with AI assistance
Spec and build: Define requirements, then let AI implement
Full SDD workflow: Complete software design documentation and implementation Each workflow runs agents in isolated sandboxes, keeping your main codebase safe while agents work in parallel.
What’s Next?
Now that Zenflow is set up, explore:- Run multiple agents in parallel — deploy agents simultaneously to build features faster
- Task types and workflows — choose the right workflow for each task
- Plans & Pricing — subscription tiers, daily limits, and billing